

Ever notice how some walls are rock-solid while others feel off? The secret is in the stud (vertical support beam) spacing. Most builders space studs 16 in (40.6 cm) apart. But you can adjust this to 12 in (30.5 cm) for extra strength or 24 in (61 cm) if you need more room for insulation and wiring. Choosing the right spacing meets building codes and ensures your wall can hold heavy items and stand up to daily wear. This guide explains the benefits of each option so you can build a wall that’s both strong and reliable.
Recommended Wall Framing Stud Spacing Guidelines
Stud spacing is measured from the center of one stud to the center of the next. Most builders use 16 in (40.6 cm) spacing to give walls, floors, and roofs strong, reliable support while leaving room for insulation, plumbing, and wiring. This spacing is common for both load-bearing and non-load-bearing walls in homes.
For some projects, like garages, basements, energy-efficient builds, or mobile homes, studs may be spaced 24 in (61 cm) apart. This extra space lets you use thicker insulation or meet special material needs. In areas with heavy loads or seismic activity, studs may be 12 in (30.5 cm) apart to boost support even more.
For example, a builder might use 24 in (61 cm) spacing in an energy-efficient design to allow extra insulation and still follow local building codes for non-load-bearing walls.
| Spacing type | Distance (OC) | Where to use |
|---|---|---|
| High load or seismic zones | 12 in (30.5 cm) | Shear walls, high wind areas |
| General load-bearing and non-load-bearing | 16 in (40.6 cm) | Standard residential framing |
| Light framing or non-load-bearing | 24 in (61 cm) | Garages, basements, mobile homes |
These guidelines not only keep your structure strong but also help you meet local building codes. Measuring and marking stud centers carefully can prevent misaligned fixtures, ensuring that heavy items like shelves or TVs are mounted safely. Always check local codes and review basic wall framing guidelines for extra details.
Wall Framing Stud Spacing: Build Right, Build Strong
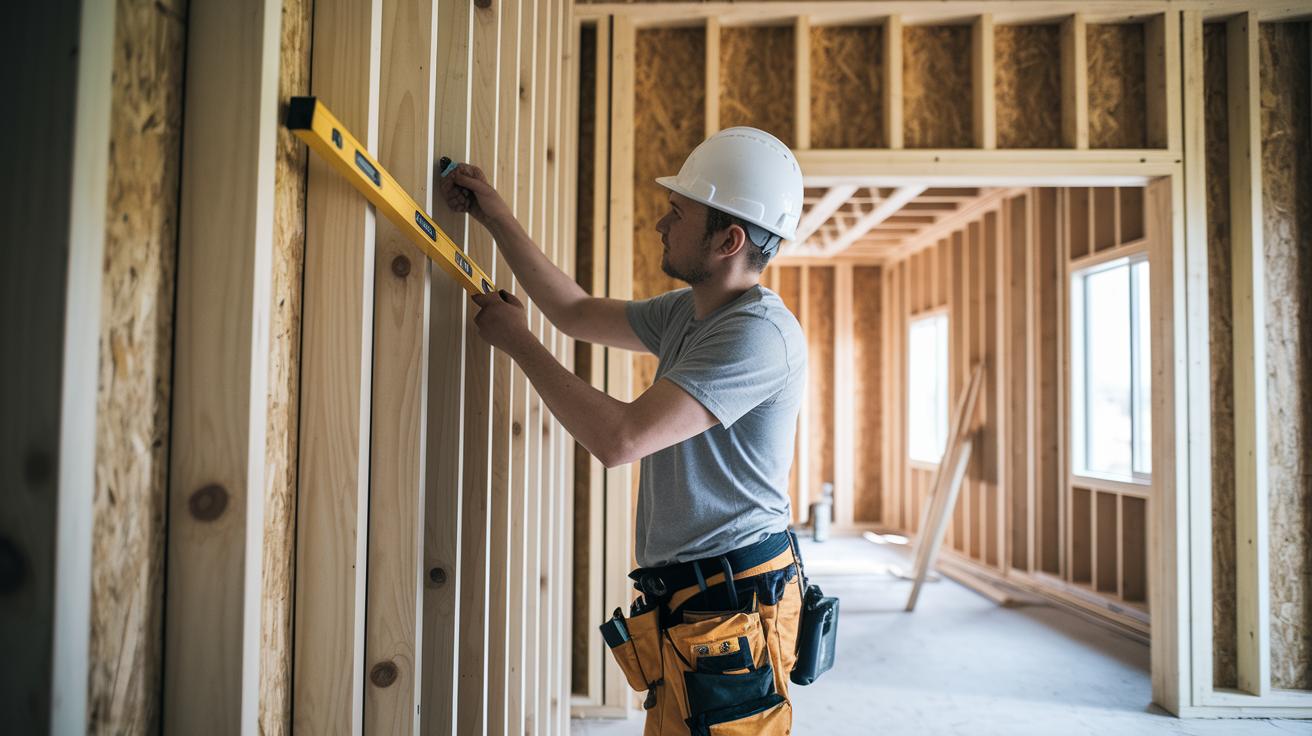
Stud spacing is a key part of building walls that are both strong and energy efficient. You need to plan the gaps between studs based on how much weight the wall must carry, where doors and windows are, and the kind of material used. This helps you set the right on-center (OC) distance for safe and efficient walls.
- Load-bearing versus non-load-bearing walls: Walls that keep up the roof or floors need studs placed close together to spread the weight. Walls that only serve as dividers can sometimes have wider spacing.
- Window and door openings: Openings require extra support. Use jack studs (extra studs beside openings) and cripple studs (short studs above or below openings) to secure the headers (top horizontal beams).
- Interior wall intersections and corner studs: Corners and wall junctions work better with double studs that add extra strength.
- Regional wind, seismic, or snow loads: Areas with high winds, earthquakes, or heavy snow may need studs spaced closer together to boost durability.
- Material type and fastener compatibility: Wood studs and metal studs react differently. Choosing the right screws or nails helps keep them secure.
- Insulation thickness and energy-efficiency goals: A wall with thicker insulation may allow for wider OC spacing for better energy performance, but it must still be strong.
All these factors work together to ensure your walls can handle heavy loads, reduce energy costs, and meet local building standards.
Measuring and Laying Out Stud Positions
Start by gathering your tools. You need a tape measure for accurate distance checks, a chalk line to draw straight marks on your top and bottom plates, and a carpenter’s square (a tool that checks angles) to ensure your marks are plumb and square. Also grab a stud finder; this handy tool lets you locate wood or metal studs behind drywall by beeping or lighting up when it passes over them.
Next, mark your top and bottom plates at even on-center intervals. Use your tape measure and chalk line to snap marks along the full length of the plates. Common spacing is 16 in (406 mm) or 24 in (609 mm) from one stud center to the next. If you like having a visual guide, check out the step-by-step process in the guide at how to frame a wall step by step. Keeping these marks clear makes sure each stud lines up correctly, which is key for a strong, straight wall.
Finally, double-check each stud location by hand and with your stud finder. If you’re not using a stud finder, measure from a known corner and use the carpenter’s square to verify that each mark stays plumb. Also, check if the stud is wood or metal before loading any heavy weight. Taking this extra step helps keep your wall supports secure and prevents problems down the road.
Wall Framing Stud Spacing and Energy Efficiency

The spaces between wall studs form the frame of a wall and also make room for insulation. They can hold insulation batts, spray foam, or blown-in insulation to help cut down on heat loss. When studs are spaced correctly, the insulation fits tightly, cutting drafts and keeping a solid thermal barrier.
EcoSmart metal studs bring a fresh twist to common framing. They come with built-in thermal breaks (features that slow heat transfer) and can reach up to a 495 PLF (pounds per linear foot) rating when used with 2 lb (approximately 0.91 kg) closed-cell spray foam. This setup creates a nearly airtight, vapor-sealed wall that minimizes drafts and boosts energy efficiency, making EcoSmart studs a smart pick for eco-friendly construction.
Using a wider on-center stud spacing can mean you fit in thicker insulation. However, this may weaken the wall's structure. Balancing the need for extra insulation with proper support is key. Get the spacing right and you'll have a strong wall that carries heavy loads while reducing thermal bridges (pathways for heat loss) and unwanted air leaks.
Codes, Standards, and Best Practices for Stud Interval Compliance
Residential projects must follow the International Residential Code (IRC). This code sets stud spacing at 16 in (40.6 cm) on center for load-bearing walls and permits 24 in (61 cm) spacing for certain non-load-bearing cases. These guidelines keep your home sturdy while still leaving room for insulation and energy savings. Header tables also control the placement of jack studs and blocking above openings to support door and window frames.
For commercial jobs, the International Building Code (IBC) or local rules apply. These regulations also focus on proper stud spacing and header support. Commercial plans often have different requirements than residential ones, so the types of fasteners and supports need to handle higher loads. During framing inspections, inspectors check plate markings, stud spacing, and header supports to ensure the work meets either IRC or IBC standards. Missing these details may force you to rework sections and could create safety hazards. Following these guidelines and local rules helps avoid costly delays and keeps your build safe and sound.
Advanced Techniques and Optimization for Wall Framing Stud Spacing

Advanced framing lets you save lumber by using techniques like a single top plate, two-stud corners, and ladder blocking. These methods cut waste while still providing the strength for load-bearing walls. For example, using a single top plate lowers costs and simplifies installation, proving that smart design saves both time and money.
Digital tools such as laser levels, digital layout panels, and calibrated spacers are changing how we frame walls. They help you mark stud positions with clear, accurate lines on your work surface. One builder even finished his layout in minutes using a digital panel, cutting setup time by nearly 50%. Using these gadgets minimizes errors and keeps each stud exactly where it belongs.
Prefabricated marking templates and custom spacers ensure consistency and keep studs plumb (perfectly vertical) throughout the build. Custom jigs with measured markings and alignment guides eliminate guesswork. Use a custom spacer to snap stud marks quickly while maintaining uniformity in your wall.
Plan carefully and optimize your layout to speed up installation and reduce waste. Advanced alignment techniques not only boost the strength and accuracy of your wall framing but also cut labor time. Many builders report significant time savings and less rework on site when they use these precision techniques, making the process faster and more cost-effective.
Final Words
In the action, we broke down stud positioning with clear, step-by-step methods for accurate on-center measurements using a tape measure, chalk line, and square. We covered load-bearing basics, energy-efficient setups, and the need for careful code checks. We also shared advanced tactics that speed installation and reduce waste.
Keep wall framing stud spacing in focus as you build a safe and cost-effective project. Stay practical, measure twice, and swing that hammer confidently.
FAQ
What is the standard stud spacing for an interior wall?
The standard stud spacing for an interior wall is 16 inches on center. This distance provides reliable support and proper cavities for insulation, wiring, and plumbing installation.
What does a wall framing stud spacing chart show?
The wall framing stud spacing chart details various on-center distances, ranging from 12 inches for heavy loads to 16 inches for standard applications and 24 inches for lighter or non-load-bearing projects.
What is the recommended exterior wall framing stud spacing?
The recommended exterior wall framing stud spacing is generally 16 inches on center for load-bearing walls, though some non-load-bearing areas may use 24 inches based on local requirements.
How do 16-inch and 24-inch stud spacings compare?
The 16-inch spacing offers stronger support and is common in residential framing, while 24-inch spacing is used in lighter walls or energy-efficient builds where reduced load demands apply.
What is the ideal stud distance from a corner?
The ideal stud distance from a corner follows standard spacing, usually 16 inches on center, with additional studs added at corners to ensure structural strength and proper load distribution.
What does horizontal stud spacing refer to?
Horizontal stud spacing describes arranging studs along a horizontal line, often seen in specific framing layouts like shear walls, where alignment is critical for maintaining structural integrity.
When is 12-inch stud spacing used?
A 12-inch stud spacing is used in high-load or seismic zones. This tighter arrangement boosts structural strength to handle heavy wind loads or unique stress conditions.
What does the wall stud spacing code dictate?
The wall stud spacing code sets the minimum required on-center distances for studs based on structural loads and local building standards, ensuring proper weight distribution and overall safety.
Are studs typically spaced 16 or 24 inches apart?
Studs are typically spaced 16 inches on center in most framing scenarios, though 24 inches may be acceptable for non-load-bearing walls, depending on local code requirements.
Why is a precut stud 92 5/8 inches long?
A precut stud is 92 5/8 inches long to fit standard wall heights, leaving room for top and bottom plates while maintaining consistent on-center spacing for the overall wall structure.
Can a 2×6 wall be spaced at 24 inches on center?
A 2×6 wall can be spaced at 24 inches on center in non-load-bearing or light-framed conditions, but local codes often favor 16-inch spacing for better structural stability.
Are stud walls typically built with 400 or 600 centres?
Stud walls are not measured in 400 or 600 centres; they are built using on-center spacing expressed in inches, typically 16 or 24 inches according to code guidelines.