
Ever wondered how a few mismeasured studs can turn a solid frame into a wobbly one? A proper stud layout goes far beyond just marking lines on a wall. It forms the backbone of a safe, sturdy home. In this guide, we outline simple DIY steps to mark, measure, and set your studs with confidence. With basic checks and the right tools, you can keep your structure strong from the floor up to the roof.
DIY stud layout techniques for home framing: Smart
Start by checking your floor frame for squareness. Use the 3-4-5 method: measure 3 ft (0.91 m), 4 ft (1.22 m) and then check that the diagonal measures 5 ft (1.52 m). This step makes sure your corners are square before you mark any layout lines.
Next, align the top and bottom plates. With a chalk line or carpenter’s pencil, mark along the plates where your wall will go. These marks become your guide for placing each stud. Standard stud spacing is 16 in (40.6 cm) on center. Measure from one end and mark each spot using a tape measure and speed square to keep things accurate.
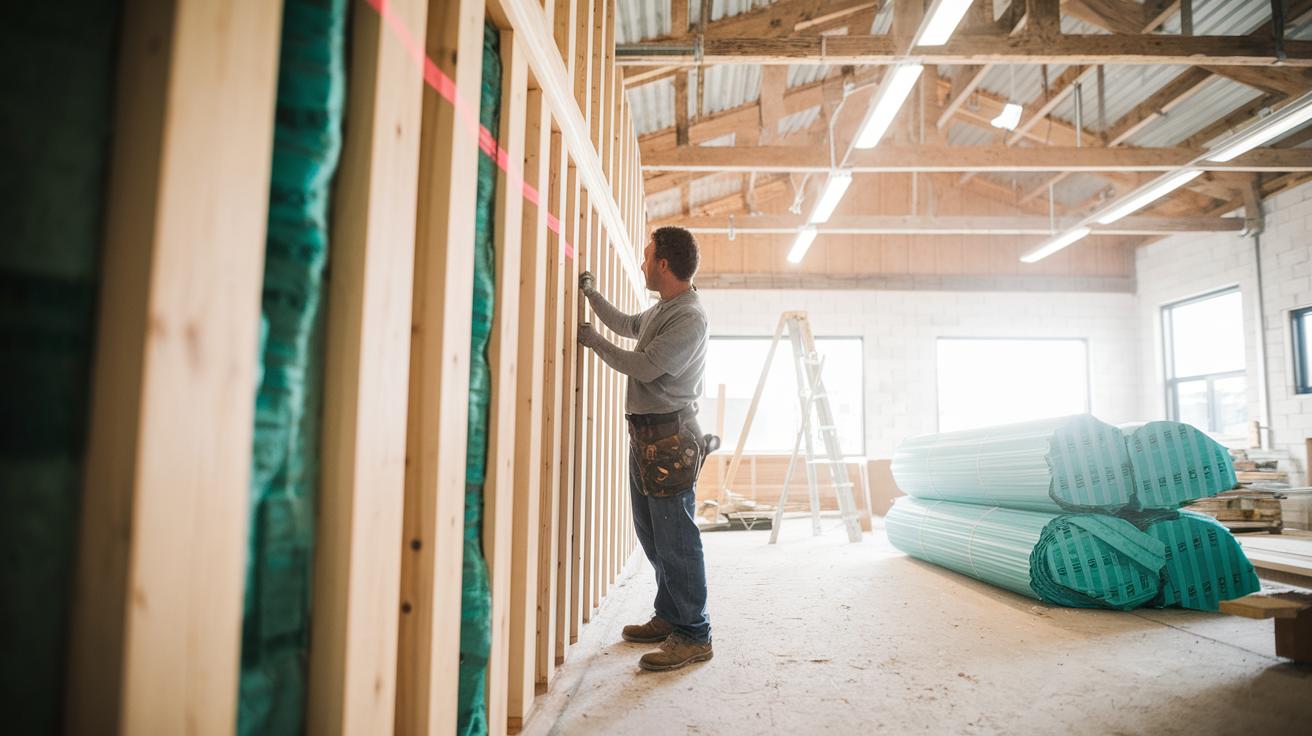
Now, line up the precut studs along your marked line. Set each stud in place and use a line laser or framer’s square to double-check that each stud is vertical and matches your marks. For example, run a plumb line beside a stud to see that it is completely straight.
When planning for window or door openings, also mark the header and jack stud positions. This step makes sure the load is supported properly. Adjust your layout as needed, and be careful to keep your marks clear and consistent from the bottom plate to the top plate.
Keep a close eye on your measurements throughout the process. Mistakes in marking can cause problems later when you install drywall or insulation. For a step-by-step visual guide, check out a framing reference.
Finally, give your work a final check with a level and plumb bob to adjust the plate placement if needed. This careful layout process sets a strong foundation that supports the wall, floors, and roof, while leaving room for insulation, plumbing, and electrical systems.
Essential tools and materials for precise stud layout

Start with the right tools and quality materials to set out your studs accurately. Using reliable supplies saves time and keeps your wall strong.
Key tools include:
- Hammer for driving fasteners and adjusting framing as you work.
- Framing nail gun (for rapid panel assembly) to speed up the job.
- Speed square to check right angles and mark even corners.
- 25-foot tape measure (25 ft / 7.6 m) to measure long distances accurately.
- Chalk line to snap straight lines along surfaces.
- Carpenter pencil to make clear, visible marks on plates and studs.
- Safety glasses that protect your eyes from flying dust and debris.
- Line laser to quickly align layout marks over long distances.
When you pick your lumber, choose straight-grained 2×4 (actual 1.5 in x 3.5 in / 38 mm x 89 mm) or engineered studs from suppliers you trust. Good lumber not only makes mounting easier but also adds long-term strength to your framing.
Getting these essential tools and materials together before you begin helps you set up a clean, precise stud layout. Local suppliers can give quick quotes, so you can budget well and plan ahead with confidence.
Step-by-step stud spacing process for home framing
Preliminary layout and plate marking
Start by squaring your plates using the 3-4-5 method. Mark each corner carefully with a carpenter’s pencil and use a speed square. Small errors at this stage can cause problems later, so if your measurements seem off, measure again before you continue.
Marking stud positions
Place your stud marks at 16 in (40.6 cm) on-center spacing. Snap a chalk line along the bottom plate and then transfer that line to the top plate. Always double-check each mark with a tape measure to avoid misalignments.
Plumb and level checks before assembly
Before securing any studs, check each marked spot to ensure it is plumb (perfectly vertical) and level. If a plumb bob or level indicates any uneven marks, adjust the plate immediately to keep everything aligned.
Advanced stud layout strategies and common pitfalls

When planning your wall supports, try using smart assembly techniques that work like a friendly neighbor’s advice. One advanced option is to use EcoSmart™ Studs. These studs have built-in thermal breaks and a structural rating of 495 PLF (pounds per linear foot), and they work with closed-cell spray foam insulation to boost energy efficiency and create airtight walls. Combine them with double top plates and jack studs (support studs placed beside openings) over doors or windows to build sturdy headers that securely divide loads.
Another reliable method is to put in blocking at 8 ft ¼ in (approximately 2.45 m) from the wall bottom. This precise level helps support future drywall hanging and cabinet mounting. Start by squaring up the wall with the 3-4-5 method, a quick, proven way to ensure everything lines up right before you mark where studs should go.
Common pitfalls in stud layout include:
- Uneven stud spacing that can cause drywall cracks.
- Skipping the header support over doors or windows, which weakens the structure.
- Failing to square the plates before laying out the studs, leading to misaligned walls.
- Using the wrong fasteners, like finish nails instead of screws for a stronger hold.
- Ignoring the manufacturer’s guidelines for engineered studs, which can hurt load-bearing performance.
Experienced carpenters always check each layout mark with a speed square or line laser to catch any misalignments early. Make sure every measurement is double-checked before moving on to assembly. Taking these extra steps not only improves precision but also builds a strong framework that will safely bear the load of your entire structure.
Safety and code compliance in stud layout
Plan your stud layout with safety as your top priority. Always put on your safety glasses and work gloves before you begin. Check every layout mark to ensure studs are spaced evenly and that top plates are securely fastened. Missing requirements like shear walls (diagonal bracing to resist wind and seismic forces) or proper header supports can lead to uneven load distribution. It’s smart to review local building codes and follow a trusted construction site safety checklist.
Remember, regional factors like strong winds, earthquakes, and local climate can affect stud size and spacing. Always check each layout mark with a level (for straight alignment) or a plumb bob (for vertical accuracy) and secure everything with the right fasteners. Missing a step here can cause structural failures and add extra costs later.
Before starting your project, review all safety protocols and checklists. This careful approach not only protects your work site and investment but also keeps your family safe and ensures the build lasts for years to come.
Integrating insulation and utilities in stud layout
Plan your stud layout with energy savings and utility access in mind. Stud spaces do more than hold the wall together, they make room for insulation like fiberglass or spray foam and house plumbing and electrical lines. When you mark stud spacing on the plates, include extra room for insulation thickness. For example, if you need thicker batt insulation, add about 1.5 in (38 mm) clearance to your stud cuts.
Set aside chase spaces or blocking to ensure there’s an easy route for future plumbing or wiring. Mark these areas clearly before cutting any plates or positioning studs. Use a chalk line to sketch out areas for access panels so your layout stays organized.
Choose kiln-dried lumber, like a quality 2×4 (actual 1.5 in x 3.5 in / 38 mm x 89 mm), to reduce shrinkage. This keeps your stud cavities the right size for insulation and utility lines.
Remember:
- Factor in insulation thickness when spacing studs.
- Leave designated chase spaces for utilities.
- Use kiln-dried lumber for reliable size and durability.
Final Words
In the action, this guide walked through key steps for marking, spacing, and securing wall studs. We covered using simple tools like a tape measure, speed square, and chalk line while emphasizing safety and local code checks. The guide detailed how to square plates, mark stud positions, and perform plumb checks. It also addressed planning for insulation and utilities. Follow DIY stud layout techniques for home framing to ensure your project stands strong, is energy-efficient, and stays within budget. Enjoy building your safe and secure home structure.
FAQ
How to frame a wall corner
Framing a wall corner involves aligning two intersecting walls accurately and squaring them with the 3-4-5 method, then using a level and speed square to check for proper plumb and alignment.
Framing a wall for beginners
Framing a wall for beginners starts with marking the top and bottom plates, setting stud spacing at 16 in (40.6 cm) on center, and verifying square corners with a simple level and chalk line.
How to frame a wall on concrete
Framing a wall on concrete entails securing a sill plate to the footing with appropriate anchors, then building the wall on top, ensuring the structure is level and properly anchored.
How to frame a wall from start to finish pdf
Framing a wall from start to finish includes measuring, marking stud positions, and assembling the top and bottom plates; refer to detailed PDFs for a complete, step-by-step guide.
Wall framing layout tool
A wall framing layout tool refers to digital calculators or guides that help determine stud spacing and wall layout, ensuring accurate measurements for a sturdy construction design.
How to frame a wall by Yourself
Framing a wall by yourself means planning the build from layout to assembly using basic tools like a speed square, tape measure, and pencil while checking for level and square markings throughout.
Wall framing layout calculator
A wall framing layout calculator streamlines figuring out stud spacing and material quantities, allowing you to input dimensions and receive precise recommendations for a balanced wall design.
Wall framing layout diagram
A wall framing layout diagram provides a visual guide to stud placements, plate alignment, and opening details, helping you mark and measure accurately for a secure, even wall structure.