
Ever thought a trim carpentry project could freshen up your home and save you money? Imagine a room receiving a facelift with custom-cut trim that highlights every detail. Many homeowners plan each step, from taking measurements to the final finish, to ensure a smooth process. With accurate cuts and the right tools, even a small project can add both style and value. This article explains how careful planning and quality materials can turn trim work into a practical, cost-effective upgrade for any room.
Planning Your DIY Trim Carpentry Projects
Start by outlining each step of your project. Accurate design measurements form the base of your plan and help cut down on material waste and extra costs. For example, one family room project saved nearly $100 when the homeowner chose custom-cut trim instead of prepackaged options.
Break the work into clear steps: measure and design, choose materials, prepare your tools, cut, install, and finish. When picking materials, think about hardwoods like oak or poplar, or even MDF with a moisture-resistant finish. One homeowner chose oak for the kitchen trim to handle moisture while still looking good.
Make sure you have the right tools ready. You’ll need a compound miter saw, a coping saw (a tool for cutting curves), and a finish nailer. Getting your tools prepped will keep delays to a minimum. Setting up a simple project timeline with key milestones can help you stick to a budget and avoid surprises.
Tailor your plan to the area you’re working on, be it a living room, kitchen, bathroom, or entryway. A clear plan leads to precise cutting, smooth installation, and a finished look you can be proud of while keeping costs low.
Essential Tools & Materials for Trim Carpentry Projects

Build your project on a solid foundation by assembling a reliable tool kit. You'll need a compound miter saw (for accurate angled cuts), a coping saw (for shaping intricate curves on molding), a finish nailer (for neat and secure fastenings), and an oscillating multi-tool (to make quick trim adjustments). Also, grab a nail set and a block plane to smooth joints and edges. One handy tip: run a dry cut on scrap wood with your miter saw to double-check your measurements before you start.
Next, choose materials that stand up to wear. Pick durable wood like oak or poplar, or select MDF (medium-density fiberboard) with a moisture-resistant primed finish that works well indoors or outdoors. Many DIYers also swear by the Ryobi rip fence and blades to quickly craft custom molding profiles from raw stock.
Before cutting or nailing anything, perform a basic jobsite safety check. This simple review helps you spot hazards and prevents accidents. For more details, visit the jobsite safety analysis guidelines at neull.com?p=81.
Organize your workspace, ready your tools, and enjoy the process knowing you’re equipped with the right gear and materials for a fresh new look in your home.
Step-by-Step Crown Molding Projects in DIY Trim Carpentry
Crown molding adds a touch of class to any room. Start with top-quality molding that matches your style and plan your cuts carefully. Set up your compound miter saw (a tool that cuts at two angles) with a 0.5° back bevel to ensure tight joints. When you face steep angles that push your saw’s limits, use a 45° clamp guide block. This step is key for dealing with uneven floor-to-ceiling heights. Decorative transition blocks can fill in gaps to create a smooth look. For a typical 12-ft (3.7 m) run, plan on spending about 2–3 hours on the project, covering layout, cutting, dry fitting, and fastening.
Begin by marking your layout with a tape measure, pencil, and level. Accurate marks mean error-free cuts. When you start cutting, double-check your miter saw settings because even a small mistake might leave visible gaps. Dry fitting lets you try the pieces together before you make any final moves. Many DIYers test a trial piece on scrap material and find that the extra 0.5° back bevel really tightens the joints. Next, secure the molding in place using a finish nailer or a hammer with 8d nails. Finally, wrap up your project by filling nail holes, smoothing edges with a block plane, and applying caulk to seal the gap between the wall and the trim.
| Step | Tools Needed | Time Estimate |
|---|---|---|
| Layout | Tape measure, pencil, level | 15 min |
| Cutting | Compound miter saw, safety goggles | 30 min |
| Dry fitting | 45° clamp guide block, carpenter’s square | 20 min |
| Fastening | Finish nailer or hammer and 8d nails | 30 min |
| Final touch-ups | Nail set, block plane, caulk | 15 min |
Baseboard Installation Tips for DIY Trim Carpentry Projects
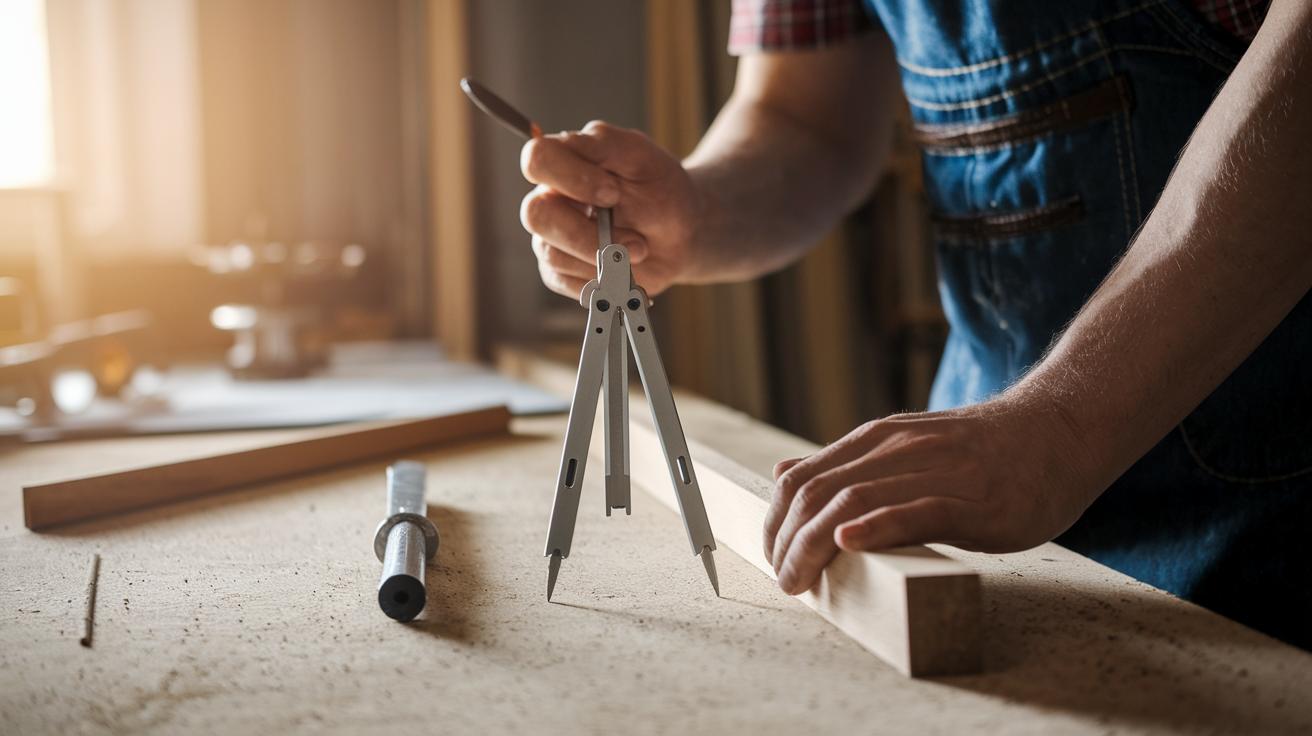
Start by getting your wall and baseboard ready. Clean off any extra joint compound from corners with a putty knife or chisel so the baseboard sits flush on the wall. Use a compass or an angle finder to mark the wall’s natural curves. This tracing gives your baseboard a custom fit on uneven surfaces.
Next, fill in wall gaps by angling an 8d finish nail at 30° (about a 30° angle). Drill pilot holes first, especially in hardwood, to stop the wood from splitting. Try your nail pattern on a scrap piece to be sure the angles and spots work well.
Place wood spacers at inside corners to keep a consistent reveal. They help manage tight spots and create a neat, gap-free look. Check your alignment as you work to make sure the baseboard stays even from start to finish.
- Measure and mark using a compass or angle finder
- Drill pilot holes in hardwood before nailing
- Angle each 8d finish nail at 30° for a secure hold
- Use wood spacers at corners to keep gaps consistent
DIY trim carpentry projects: Brighten Your Home
Wainscoting adds charm and extra wall protection. It usually stands between 32 in (81 cm) and 42 in (107 cm) high. This height gives your room visual depth without crowding the space. You can combine flat panels with raised ones for a touch of style, or even design a hidden door panel for extra storage.
For the best finish, pick materials that look great and last long. MDF (medium-density fiberboard) or primed finger-joint pine (pine wood pieces joined together) are affordable choices for many rooms. If you’re working in damp areas, marine plywood is a smarter pick.
Follow these simple steps to install your wainscoting:
- Top rail: Mark the top edge and attach the horizontal trim.
- Vertical stiles or battens: Secure these pieces to frame your panels.
- Panel or beadboard inset: Fit the decorative panels between the stiles.
- Base shoe: Add the bottom trim to neatly cover any gaps.
One DIYer used primed finger-joint pine in a dining area, which kept costs low and brightened the room. With clear planning and accurate cuts, your custom wainscoting project will boost both the style and function of your space.
Window & Door Trim Carpentry DIY Projects
Start with the window casing. First, install the sill, then attach the apron. Next, add the side jambs and finish by fitting the head casing. For the head casing, use coped or mitered returns to blend the trim neatly with the window head. A smart tip: dry-fit your pieces on scrap wood to check if everything lines up before installing permanently.
For door casing, add classic style using jamb extensions and plinth blocks. Dry-fit the miters first to catch any misalignments. When you need to cut hinge mortises (recessed areas for hinges) or reveal grooves, an oscillating multi-tool works fast and gives you precise plunge cuts.
Strengthen your mitered corners with biscuit joinery (using small, oval-shaped wood pieces) or a good dab of wood glue. This method secures the corners and hides any small gaps that occur during installation. Always try these techniques on a sample piece first so you can see how the extra bond boosts strength and offers a cleaner look.
Accurate measuring and careful cutting are key to a professional finish. Always wear protective eyewear and a dust mask while cutting and sanding your trim for safety.
Finishing Techniques & Custom Molding Designs in Trim Carpentry
Sand your trim using 120 grit to 220 grit sandpaper. This smooths the surface and gets the wood ready for filling and painting. Try sanding a scrap piece with 150 grit to see how evenly it smooths out.
Fill any nail holes with wood filler and seal where the trim meets the wall using caulk. Use a putty knife to push the filler in, and then smooth it with your finger to hide small imperfections, much like repairing a worn piece of furniture.
When working with long pieces of molding, add biscuits or splines (small, oval pieces of wood that boost strength) to reinforce the joints. Even if the boards are slightly misaligned, these help create a tight, seamless joint.
After you fix the joints and smooth out imperfections, apply a coat of primer. Then add two coats of semi-gloss enamel for a durable finish that brightens your space. For extra detail, you can incorporate backbands, rosettes, or custom plinth blocks to upgrade your trim from basic to refined.
Always test each step on a scrap piece before working on your final trim.
Troubleshooting & Maintenance for DIY Trim Carpentry Projects

When working on trim carpentry, you may run into issues like open miters, crooked walls, or small gaps that spoil your clean finish. If miters don’t line up, try adding a tiny back bevel or shifting your compound miter saw by 0.5° (a small angle adjustment). This simple change often makes the joints meet nicely. If you notice a wall hump, cut out a small section of drywall to reveal any misaligned studs (vertical support beams). Then, realign the studs and secure them with angled screws. Always test these fixes on scrap wood before making changes to your actual pieces.
Keeping your trim neat is easy. Wipe off dust after each session and check for moisture damage that could cause warping. Repaint every 2–3 years to keep a smooth, even look. When walls aren’t perfectly straight, scribe (mark) your trim to match the wall’s shape. A small, precise mark can make a big difference in the finished look.
Here are some quick tips:
- Add a slight back bevel or shift the saw setting by 0.5° for open miters
- Cut drywall to expose and realign studs when you find wall humps
- Test any minor fixes on scrap material first
Remember: Safety always comes first.
Follow these repair methods and safety tips to fix problems and keep your trim looking as sharp as possible.
Budget-Friendly Accent Trim Projects for DIY Trim Carpentry
Budget projects can upgrade your space without heavy demolition or pricey renovations. Try making floating shelves from reclaimed wood. They add a modern touch and usually cost between $20 (about 18 USD) and $50 (around 45 USD) in materials. One DIYer turned an old board into floating shelves that now proudly display favorite books.
Another smart idea is picture-frame molding. This molding goes around mirrors or artwork to create a custom frame. It gives any room a fresh look without costing much. Chair rails, which help protect walls and add style, also work well with basic hardware and are easy to install.
For a dramatic effect, consider secret-door panels or floating desks built from upcycled scrap wood. Using reclaimed boards cuts material costs and gives your project a unique character. You can also add decorative blocks or rosettes to mask uneven joints, making your trim work look more polished.
Mix these accents for a bright, custom look. Experiment with different textures and finishes. These projects are perfect for beginners looking for simple woodworking ideas that combine low-cost materials with creative design.
Final Words
In the action, we broke down the planning, essential tools, and step-by-step techniques needed for DIY trim carpentry projects. The guide covered everything from design measurements and cutting methods to finishing touches and troubleshooting common issues. Each section offered clear steps to help you stay on schedule and keep costs in check.
Moving forward, apply these practical steps to tackle any trim installation confidently. Have fun refining your space while learning new skills and keeping your project safe and budget-friendly.
FAQ
Q: What are some simple and easy DIY trim carpentry projects?
A: Simple DIY trim projects include custom moldings, baseboards, and decorative accents. They boost room appeal without overspending and many guides help you plan, measure, cut, and install with clarity.
Q: How does making trim molding work?
A: Making trim molding involves measuring your space, selecting quality wood or MDF, and cutting with a compound miter saw. Sand, finish, and install to create a custom, neat look throughout your home.
Q: How do you make your own trim for sewing projects?
A: Making your own trim for sewing involves choosing fabric, cutting it to the desired width, and finishing the edges using hem stitching. This approach adds a personalized decorative touch to garments and crafts.
Q: How does making trim in Minecraft work?
A: Making trim in Minecraft involves using creative building tools to design decorative borders and accents. Experiment with different block types and placements to give your structures a unique, stylish finish.
Q: What is wood trim and how can it be used?
A: Wood trim refers to molded wooden accents used to frame walls, windows, and doors. It enhances room aesthetics by covering gaps and adding a refined, finished look to any interior or exterior space.
Q: How do I make baseboard molding with a router and what is baseboard trim?
A: Making baseboard molding with a router means using a guide for smooth, precise curves and cuts. Baseboard trim covers the wall-floor transition, offering a refined finish that boosts both safety and style.
Q: What can be used for cheap trim?
A: Affordable trim options include reclaimed wood, MDF, or finger-jointed pine, which offer cost-effective alternatives to expensive materials while maintaining quality and a neat, finished look.
Q: What are the most profitable wood projects?
A: Profitable wood projects typically include custom trim installations, furniture, and decorative accents. They offer a strong return on investment by combining creative design with cost-smart material choices.
Q: What is the best wood for trim work?
A: The best wood for trim work is often oak, poplar, or moisture-resistant MDF. These materials provide durability, a smooth finish, and consistent performance whether used indoors or for exterior accents.
Q: Is trim hard to DIY?
A: DIY trim projects can be challenging but are manageable with proper planning, the right tools, and clear instructions. With precision and patience, many homeowners find trim work rewarding and cost-effective.