
Ever notice how a well-framed wall can change the stability of your home? Building a wall frame might look simple, but every step matters. You start by marking stud centers every 16 in (406 mm) and then secure them with pocket holes (drilled holes that hold screws firmly). This guide walks you through each step with clear tips and reliable tools. In the end, you’ll have a wall that is square, level, and built to last. Let’s turn raw lumber into a strong wall you can depend on.
Step-by-Step Wall Framing Workflow

We’ve broken down the process to build a solid wall frame that’s square, level, and built to last. Start with a 2×4 (actual 1.5 in x 3.5 in / 38 mm x 89 mm) trimmed to 25" (63.5 cm) for the top plate, use a plumb bob for vertical accuracy, and secure your studs with pocket holes made using a Kreg jig. Each step and check is crucial to keep the wall strong and true.
-
Measure and mark the layout.
Measure the wall’s length and mark where the studs will go along the floor using a chalk line. For instance, mark stud centers every 16 in (406 mm). -
Cut the top and bottom plates.
Trim the top plate from your 2×4 to 25", ensuring the edges are straight and the corners form a perfect 90°. Use a measuring square for accuracy. -
Transfer the layout marks.
Place a spacer board between the plates to transfer your layout marks. These marks will guide you in positioning each stud evenly along the wall. -
Check vertical alignment.
Hang a plumb bob from a corner of the top plate to make sure the bottom plate lines up directly underneath. This keeps your wall perfectly vertical. -
Cut and secure the studs.
Trim each stud to the exact height needed between the plates. Then, use a Kreg jig to drill pocket holes and attach the studs firmly with screws, ensuring strong and reliable joints. -
Install corner bracing.
Add diagonal bracing between studs at an angle of 45° to 60° to boost the wall’s side-to-side strength and overall stability. -
Complete the rough-ins.
Run your electrical wiring and install boxes before attaching the drywall. Finish by painting the wall once everything is securely in place.
Diagram placeholder: [Plate and stud placement diagram]
Essential Tools and Materials for Wall Framing

Start by gathering the tools and materials you need to frame your wall. This helps your project run smoothly. Use two-by-four lumber (2×4, actual 1.5 in x 3.5 in / 38 mm x 89 mm) to build one-story wooden walls without using heavy machinery.
Hand tools are key. Use a measuring square to check your 90° angles (right angles) and a spacer board to transfer layout marks. A plumb bob confirms the studs are straight (vertical). A Kreg jig makes it easier to cut pocket holes (small recesses for screws) and attach studs securely.
Make sure your kit also has nails, screws, OSB or plywood sheathing, top and bottom plates, studs, a vapor barrier, and electrical box mounts. These items work together to create a strong, reliable wall frame.
| Tool/Material | Purpose | Recommended Spec |
|---|---|---|
| Two-by-four lumber | Frame structure | 2×4 (actual 1.5 in x 3.5 in / 38 mm x 89 mm) |
| Measuring square | Check right angles | Standard carpenter’s square |
| Spacer board | Transfer layout marks | Same width as lumber |
| Plumb bob | Confirm vertical lines | Standard weight |
| Kreg jig | Create pocket holes | Compatible with #8 screws |
When choosing your tools and materials, consider your project’s size and your budget. For small jobs, standard-grade components work well; for larger or load-bearing walls, opt for higher-quality, specialized tools.
Safety Protocols for DIY Wall Framing

Always wear your PPE, hard hats, safety glasses, and work gloves, to protect yourself from flying debris and accidental tool slips. Hold your tools firmly and keep your work area clear to prevent accidents. Use manual alignment tools, like plumb bobs (tools with a weight used to check vertical lines) and measuring squares, carefully to keep your framing true. For more on safety rules, check the construction site safety guidelines here: https://neull.com?p=.
Before you begin, look for hidden utilities such as wires, pipes, or gas lines. Avoid nailing or screwing where these are located to prevent dangerous accidents or costly damage. Take a moment to inspect the area and have the right utility maps or confirmation of clearance.
Make sure you have a stable footing and use a secure ladder when aligning plates and setting up your workspace. Choose a level, sturdy ladder and ensure it sits on a flat surface. This simple step helps prevent falls when you handle heavy framing members on higher surfaces.
Accurate Layout Planning Techniques for Wall Framing
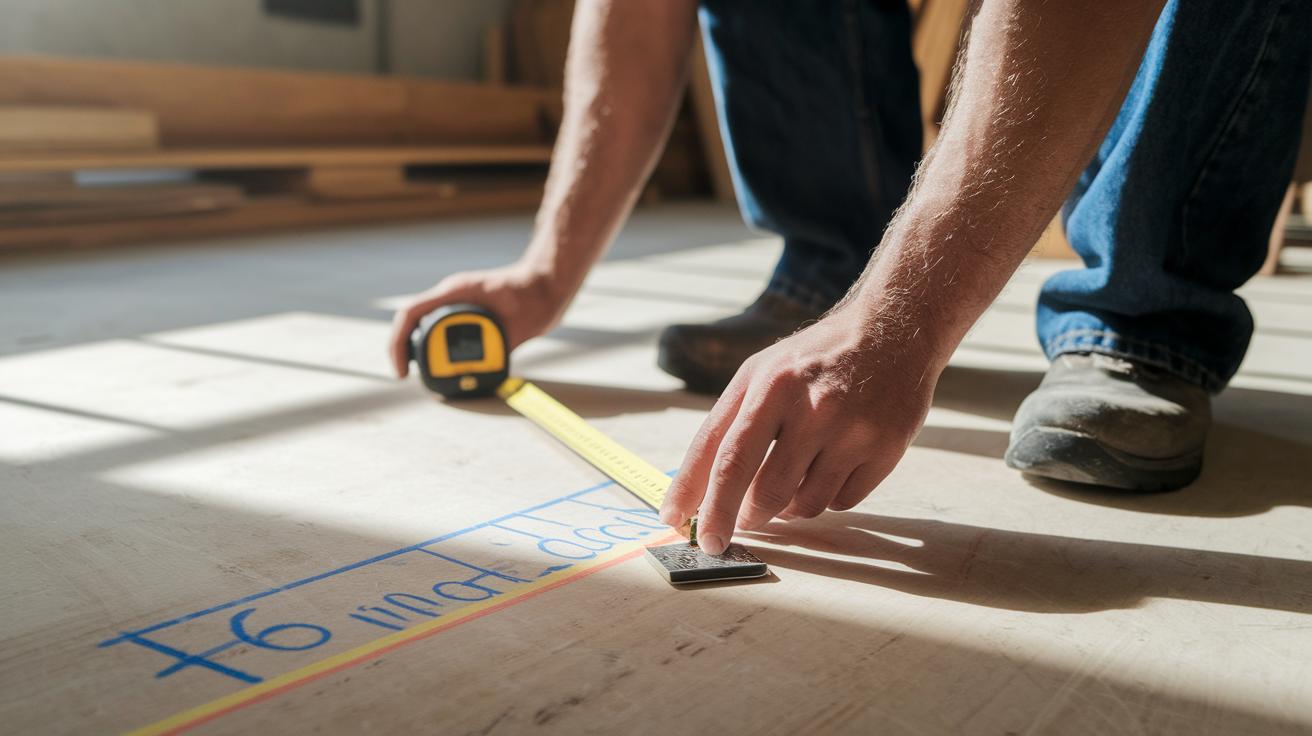
Start by measuring the distance from the floor to the ceiling with a tape measure. If the floor is uneven, check at several spots and average the results to get the right stud length.
Snap a chalk line along the floor at 16 in (406 mm) on center to mark where each stud will go. Then use a spacer board to transfer these marks to the top plate, ensuring every stud position lines up.
Finally, use a measuring square to check that all corners are 90° (right angles). This early check helps catch any misalignments so you can adjust before you move on.
Cutting and Attaching Top and Bottom Plates
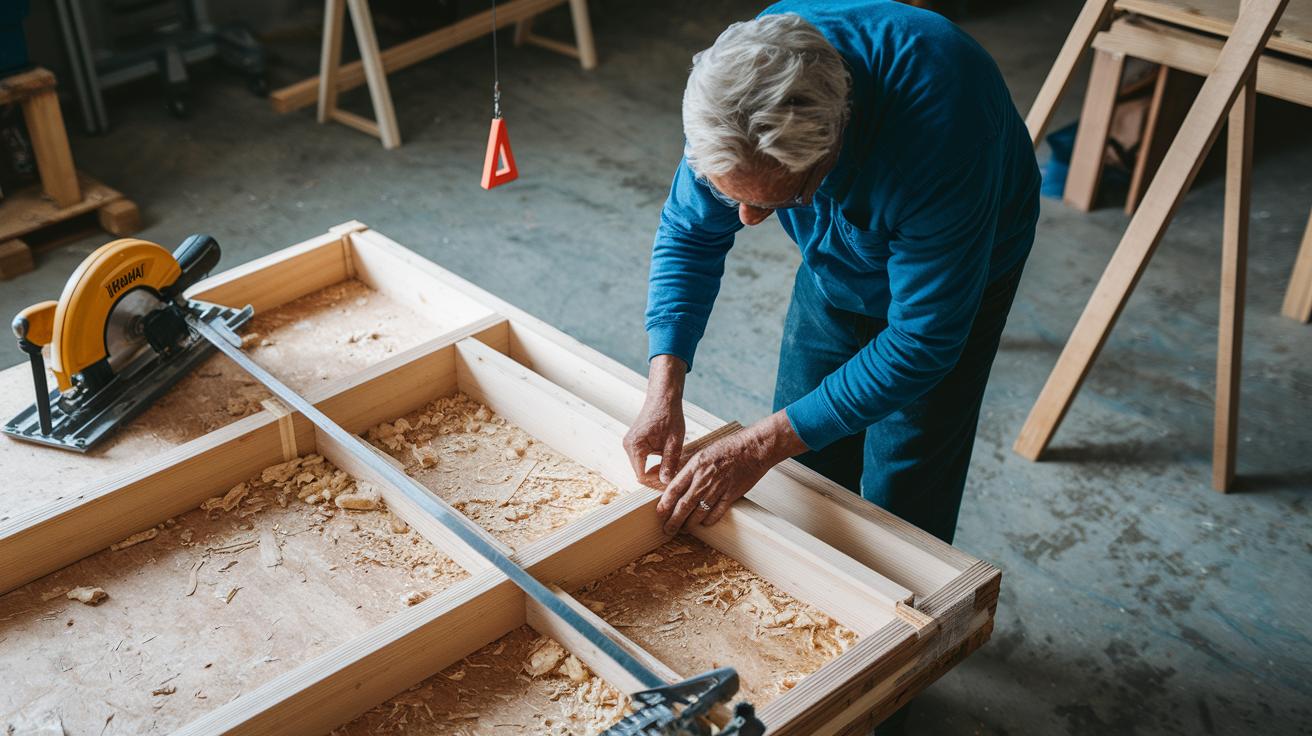
Start by cutting your top plate from a 2×4 (actual 1.5 in x 3.5 in / 38 mm x 89 mm) to match your project's width. Check that each corner forms a perfect 90° angle using a measuring square. A clean saw cut helps ensure tight joints.
When it’s time to secure the plates, place the bottom plate directly under the top plate using a plumb bob method. For wood floors, this method will keep your alignment true. If you’re working with concrete, inspect the surface to spot any uneven areas. You might need to add shims (small wedges) and use masonry screws or anchors to fix it in place. Always test the level of the concrete and add shims as needed before driving in the anchor.
Wear your safety glasses during cutting and anchoring.
Basic Stud Installation Techniques and Structural Layout

Pre-cutting Studs
Measure the gap between the top and bottom plates using a tape measure and a framing square for extra accuracy. Mark the stud clearly before you cut it. After the initial cut, double-check the stud’s length, if you are measuring 7 ft (2.13 m), recheck it to avoid small gaps. If your measurements look off, use a scrap piece as a test fit before finishing the cut.
Securing Studs
Once trimmed, use a Kreg jig to drill pocket holes at the right angle in each stud. Choose screws that are the correct length (for example, a #8 screw at 2.5 in or 6.4 cm) so the stud attaches securely between the top and bottom plates. Check that every stud is plumb (vertically straight) and level as you fasten the screws. If a stud moves slightly, adjust by loosening and then tightening the screws in sequence rather than over-tightening one spot.
Installing Diagonal Bracing
For extra lateral stability, install diagonal bracing at angles between 45° and 60°. You can use short blocks or OSB sheets for this purpose. Make sure each brace is connected firmly at both ends so a tight triangular structure forms. If you find that the bracing isn’t improving stability, recheck the spacing between the studs and ensure that the braces are properly secured at each connection.
- Double-check all measurements with a spirit level.
- Use consistent fastening methods to keep the studs aligned.
- Test the wall’s stability after you install each brace.
Corner Joinery Construction Tips for Wall Frames

When you build a wall, getting the corners right is key. A solid corner joinery makes sure the wall carries weight evenly and stays square. One common method uses several studs (vertical wood pieces) with short blocks between them. This forms a sturdy corner, but you will need more lumber and fasteners.
Other techniques, such as the California corner or the single-post method, are simpler and help reduce energy loss by limiting cold spots. For example, a California corner uses fewer studs, which also cuts down on thermal bridging (unwanted heat loss through extra wood). When you choose your corner joinery method, consider both your material costs and your insulation needs. Always measure carefully to ensure proper alignment and avoid gaps later on when you install drywall. Pick the method that works best for your project.
Sequential Door Frame Installation and Header Construction
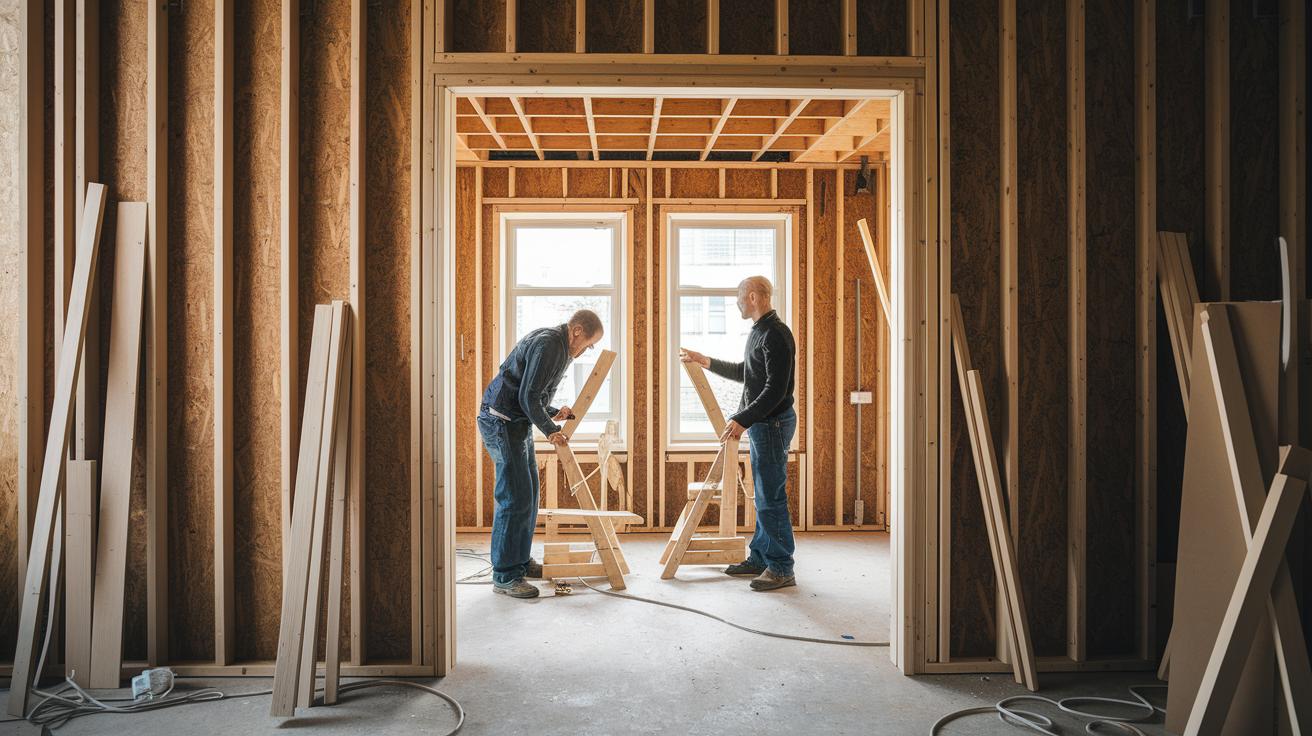
Start by building the header for your door opening. First, measure the opening carefully. Cut two 2x4s (actual 1.5 in x 3.5 in / 38 mm x 89 mm) to match the door width exactly. Then, cut a ½ in plywood piece (approximately 12.7 mm thick) to the same length. Sandwich the plywood between the two 2x4s. Drill pilot holes and fasten the assembly with nails or screws. Use clamps to hold everything steady until the fasteners are secure. This header supports the weight from above and provides a solid backing for your door.
Next, install the studs that support the header. Place king studs along both sides of the door opening, running from the top plate to the bottom plate. Immediately next to the opening, install jack studs to directly support the header's load. Then, add cripple studs above the header to keep the spacing even and support the wall sheathing. Measure, square, and check that each stud is plumb to prevent fit or finish issues later.
Wall Bracing and Sheathing Methods for Durability

For projects that require extra strength, use advanced bracing and special sheathing. Try metal straps or engineered wood bracing (wood shaped to handle loads) arranged in custom patterns to better transfer weight, especially in high wind areas. Check your local weather and moisture conditions before choosing a sheathing that resists water or has a treated finish.
| Method | Material | Angle/Spec | Benefit |
|---|---|---|---|
| Advanced diagonal bracing | Metal straps with 2×4 blocking (actual 1.5 in x 3.5 in / 38 mm x 89 mm) | 45°–60° | Transfers loads better in windy spots |
| Custom bracing patterns | Engineered wood | Varied setups | Distributes weight evenly for added stiffness |
| Treated OSB sheathing | Water-resistant OSB panels | Standard size panels | Works well in humid climates |
| Enhanced plywood sheathing | Exterior-grade plywood | Evenly fastened | Provides strong moisture protection with vapor barrier integration |
When choosing your sheathing, consider your local conditions. In humid areas, use water-resistant OSB or exterior-grade plywood with a built-in vapor barrier. In drier areas, standard treated OSB paired with custom bracing might be enough. For example, design a bracing layout that reinforces load paths, much like a ship’s frame holds steady in rough seas.
Avoiding Common Framing Pitfalls in Wall Construction

Even when you measure carefully, unexpected issues can still throw off your wall frame. Check for tiny twists in the studs or gentle bows that a normal tool might miss. For example, a stud with even a small bend might signal warping from temperature changes or moisture problems. Did you know a one-degree twist in a wall can lead to uneven load distribution and misaligned doors over time? To catch these early signs, use tools like a laser level to spot small shifts or calipers (precision measuring devices) to check for warping.
When you run into these tougher problems, don’t stop at the basic recheck. Add extra diagonal bracing at key spots like near doorways or areas exposed to moisture. Re-measure irregular spacing with precise tools, and if you notice a hint of twisting in the wall, add supplemental blocking (short pieces of lumber for extra support) to stabilize the load. For example, if a door frame seems a bit off, put in a small diagonal brace to help redirect stress and correct the alignment before it becomes a bigger issue.
Final Words
In the action, you tackled every step from layout planning and precise plate cutting to stud installation and door framing. You learned how careful measurements and proper bracing lead to a strong, durable wall. Safety protocols and practical tool choices were also essential.
Each step builds on the last, making the process clear and manageable. Use these tips as a roadmap for your next project on how to frame a wall step by step, and enjoy watching your plan come together safely and on budget.
FAQ
How to frame a wall step by step for beginners?
The wall framing process for beginners involves marking the layout, cutting top and bottom plates to size, aligning them precisely, and installing studs for a secure, straight frame.
How to frame a wall using video tutorials or picture guides?
Using video tutorials and picture guides lets you see each step firsthand—from measuring and cutting to stud installation—making it easier to understand and replicate the wall framing process.
How to frame a wall using a PDF guide?
A PDF guide explains every step of wall framing, detailing measurements, cutting, alignment, and stud placement with clear instructions and diagrams to help you finish the project.
How to frame a wall corner?
Framing a wall corner involves placing multiple studs and using support blocks to create a strong, square joint that effectively transfers loads and maintains proper alignment.
How to frame a wall by yourself?
Framing a wall by yourself means carefully planning your layout, measuring accurately, cutting materials with precision, and following step-by-step instructions to build a sturdy wall solo.
How to build a wall in an existing room?
Building a wall in an existing room requires measuring the space, adapting the design to openings and existing structures, and integrating new framing aligned with the room’s layout.
How to frame a wall on concrete?
Framing a wall on concrete starts with securely anchoring the bottom plate using masonry screws or anchors, then using a plumb bob to ensure the wall stays vertical throughout installation.
What are common mistakes when framing a wall?
Common wall framing mistakes include inaccurate measurements, uneven stud spacing, misaligned plates, and missed bracing, which can lead to unstable frames and issues with drywall finishes.
Do you frame walls with 2×4 or 2×6 lumber?
Wall framing typically uses 2×4 lumber for standard strength, while 2×6 boards offer extra insulation and load capacity, with the choice depending on local codes and specific project needs.