
Ever thought a deck might turn into a big headache if you don’t plan it right? Start with a simple sketch that shows how the sun, privacy, and home access come into play. Map out your deck early and check local guidelines to dodge surprises. This guide walks you through each step to build a deck that is safe, budget-friendly, and fits your space perfectly. A little planning now goes a long way.
Planning Decking Construction: Key Stages and Workflow
Begin by drawing a simple sketch of your deck design. Look at factors like sun exposure, privacy, and how you enter the house. Early planning makes sure your deck fits the space perfectly. For example, imagine a 10 ft x 12 ft (3 m x 3.7 m) floating deck built in two days on a warm June weekend, good planning can lead to quick success.
Next, get all the permits you need and check your local building rules. Adjust the deck size by cutting setbacks on free sides by 1.5 in (38 mm) and include a skirt of 0.5 in (13 mm) with boards that extend 1 in (25 mm) past the edge. These steps help you avoid surprises and keep the work smooth.
- Draw the deck design and layout.
- Check property factors like sun exposure, privacy, and how you access your house.
- Get required permits and follow local building codes.
- Adjust dimensions by reducing the size on free sides.
- Use the DCA-6 Deck Construction Guide for span tables, lumber sizes, and fastener details.
- Create a project schedule using a timeline template (see https://neull.com?p=194).
Follow these six steps as a clear checklist to cover every detail. This simple workflow, from planning to scheduling, builds a strong base for a code-safe deck that stays on track and within budget.
Planning Decking Construction: Smart Steps for Success

Start by choosing between a freestanding deck or one attached to your home. A freestanding deck lets you place your space exactly where you want it, while an attached deck provides easy access from inside. Draw a simple layout to plan the deck’s shape, levels, and features like built-in seating, planters, or an outdoor kitchen. This hand-drawn sketch will help you pick a design that highlights your property’s best angles.
Next, think about how your deck will interact with the outdoors. Position it to catch plenty of sunlight or offer shade where needed and to encourage good airflow. You might use a modular or multi-level design to create clear zones for relaxing or entertaining. Sketch out these areas, much like mapping a small patio with comfortable chairs and a dining spot, to ensure every space works well and feels inviting.
Finally, let current trends guide your final design. Consider features like integrated pergolas or roof decks that match your home’s style. Modern options such as cable railing systems add clean, sleek lines and extra safety. For example, a multi-level deck with floating steps and smooth railings can combine style and function perfectly. This thoughtful approach brings all design elements together into a deck that is as practical as it is attractive.
Budgeting and Cost Estimation for Decking Construction Planning
Break your deck budget into clear parts. First, list materials like lumber, hardware, and decking boards. Next, consider labor, whether you’re doing the work yourself or hiring a contractor. Finally, add any permit fees. Use a cost-per-square-foot method; decks usually cost between $15 (approx. $15 per sq ft) and $35 per sq ft. For example, a 10 ft (3 m) by 12 ft (3.7 m) deck (120 sq ft / 11.1 m²) at $20 per sq ft totals about $2,400.
Also, plan for surprises by setting aside an extra 10–20%. If your budget is $2,400, a 15% buffer increases it to around $2,760. This step-by-step breakdown helps keep your project realistic and avoids unexpected costs.
Permits, Regulations, and Code Compliance in Deck Construction Planning

First, check with your local building authority for permit rules. Many areas need detailed drawings and site plans. Even a simple deck may require full blueprints that show measurements and load-bearing parts.
Next, follow your building codes step by step. Railings should be 36 in (91 cm) to 42 in (107 cm) tall and must have balusters no more than 4 in (10 cm) apart to guard against falls. Look at the DCA-6 guidelines for proper spans and fastener details. Also, review any local changes that might affect your deck.
Finally, set up inspections at key points in your build. Schedule checks after the footings are set, once the framing is done, and at the final inspection. This ensures local inspectors review each step, keeping your deck safe and code-compliant.
DIY vs Professional Deck Construction Planning Strategies
When planning your deck, first check your own skills and the time you have available. A DIY route can cut labor costs, but you'll need to research material details and local building rules. Handling permits, inspections, and careful structural work on your own means you must be ready to learn each step. For example, if you feel comfortable using a small scrap of 2×6 (actual 1.5 in x 5.5 in / 38 mm x 140 mm) to line up your joist hangers and follow safety guidelines, designing your deck can be both fun and cost-effective.
If that sounds like too much hassle, hiring a professional can take a lot of the work off your plate. Contractors handle permit paperwork, tough structural issues, and inspections, which makes things simpler if you're not experienced. Sometimes, a mix works best, you can plan and design your deck on your own, then bring in experts for parts like electrical work or advanced framing. This way, you keep control over your design while experts handle the tricky details.
Material Selection and Tool Inventory for Planning Deck Construction
Gather all your materials and tools first to keep your deck build on track and code-safe. Use pressure-treated lumber, like 2×6 for joists and 2×8 to 2×12 for beams, to support heavy loads. Pick decking boards such as composite or cedar for a good mix of low upkeep and durability. Don't forget key hardware like joist hangers that fit your lumber size and resist corrosion, choose G-185 galvanized or stainless steel in coastal areas. Secure your ledger with flashing and fasten it using through-bolts or structural screws that penetrate the rim joist.
Use stainless steel or coated screws for fasteners since they hold up best against the weather. For a solid footing, also gather concrete mix, sonotubes (cardboard tubes used to shape concrete), and a gravel base.
| Material | Specification |
|---|---|
| Pressure-treated lumber | 2×6 for joists, 2×8–2×12 for beams |
| Deck boards | Cedar or composite, 5/4×6 |
| Joist hangers | Size-matched, G-185 galvanized or stainless |
| Fasteners | Stainless steel or coated deck screws |
| Footing materials | Concrete mix, sonotubes, and gravel base |
Before you buy, compare prices at local lumber yards and home improvement stores. Ask if they have printable deck blueprints or material lists to use as a checklist. This careful check keeps your project on schedule and avoids last-minute trips. Stick with reliable vendors for steady stock and fair prices, and make sure every material meets your project’s needs.
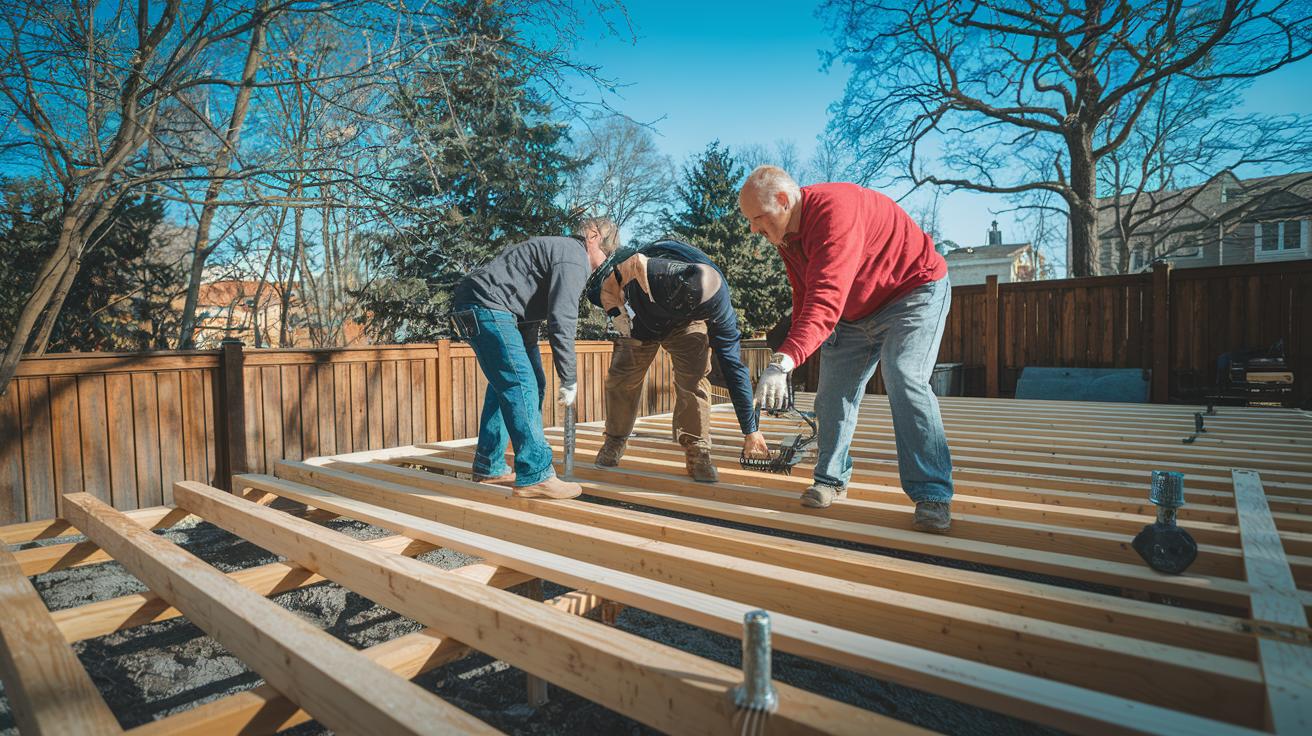
Structural and Framing Design Basics in Decking Construction Planning
Begin by spacing your joists evenly. A common rule is to place them 16 in (40.6 cm) on center. Grab a scrap piece of 2×6 (actual 1.5 in x 5.5 in / 38 mm x 140 mm) and use it to line up each hanger. This ensures every joist sits correctly and helps prevent load shifting.
Next, pick the right beam size and set your footings carefully. For example, 2×8 beams typically span about 12 ft (3.7 m), 2×10 beams around 15 ft (4.6 m), and 2×12 beams nearly 18 ft (5.5 m). Use these guidelines to match your lumber with design and load needs. Make sure footings are placed accurately; any misalignment can weaken both beams and joists.
Finally, attach the rim joist correctly by securely fastening it to the ledger. Keep your deck boards parallel to the beams for a neat and strong frame. When adding surface-mount posts, use structural screws, extra blocking, and trim the post bases so the fasteners stay hidden. These steps give you a solid and flexible deck framing design.
Safety Precautions and Compliance in Planning Decking Construction
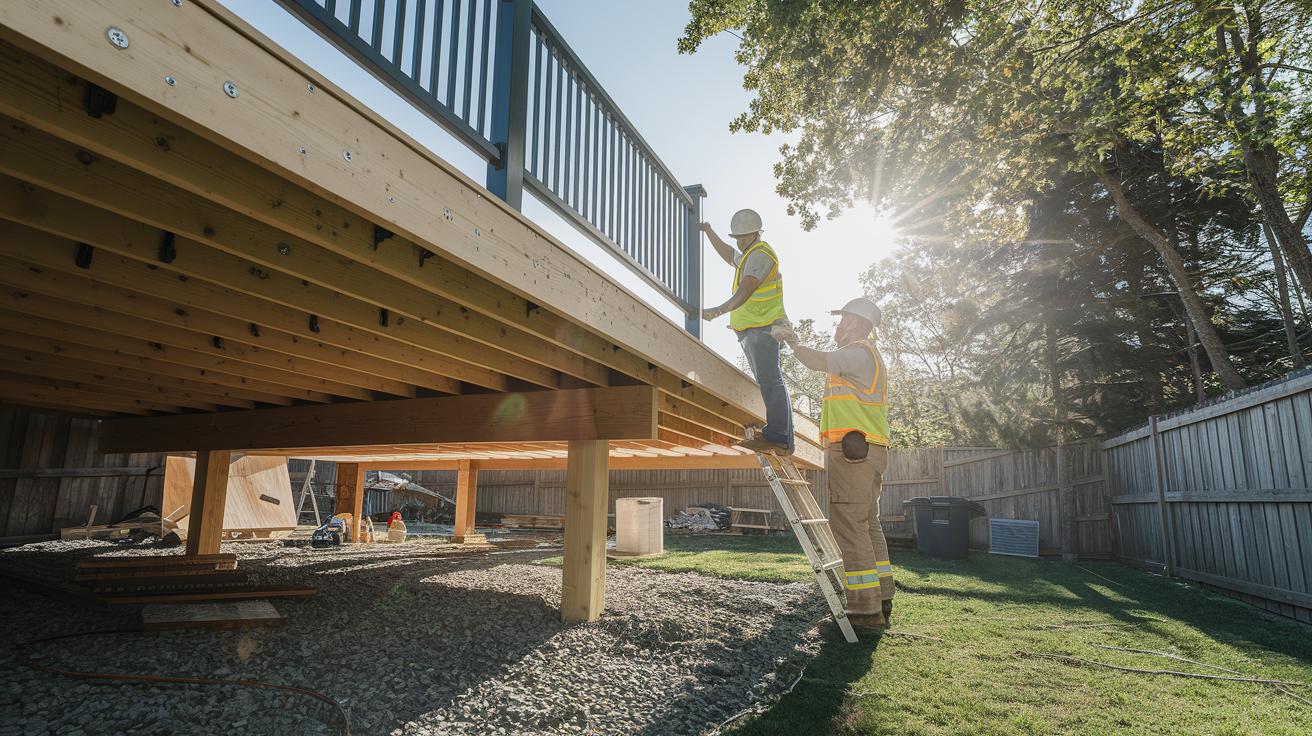
Planning your deck means keeping safety and local building codes front and center. Always use guardrails and balusters that meet local height and spacing rules. Handrails should be 34–38 in (86–97 cm) high to guard against falls. Set up your work area with proper safety gear such as hard hats, gloves, and eye protection. Use fall protection and wear personal protective equipment when working at heights.
Flash the ledger board correctly to keep water out and prevent rot at the house connection. Choose hardware that resists corrosion to secure your deck in weather-exposed areas.
Before and during assembly, check every component for code compliance. Ensure that each fastener, connector, and support element is rated for outdoor use. Flashing on key joints, like the ledger board, helps ward off water damage and extends the deck’s lifespan. Schedule regular inspections and follow construction site safety guidelines to catch any issues early. Adding extra blocking and secure fixtures boosts safety even more. These steps help you build a deck that is safe, sturdy, and meets local building codes. Follow these measures without compromise.
Maintenance and Long-Term Durability Planning for Decking Construction
Inspect your deck every season to catch problems early. Look for worn flashing, loose fasteners, and warped boards. Each check lets you spot early signs of wear or water damage. Clean your deck every year with a mild detergent or a deck cleaner to remove dirt and mildew. This simple cleaning helps keep the deck’s natural color and strength intact. Keep a log of your inspections to track repairs and address issues before they worsen.
Protect your deck with regular treatments and proper drainage. Reapply sealant or stain every 2–3 years to block moisture and UV rays, reducing the risk of decay. Make sure water drains freely under your deck to avoid standing water, which can damage the wood. Using a home maintenance checklist ensures that preventive treatments and drainage are handled, keeping your deck safe and visually appealing over time.
Final Words
In the action, you mastered key deck planning stages, from sketching your design and checking local permits to selecting materials and safety guidelines. You now have a clear roadmap to tackle each step confidently.
Your guide on planning decking construction sharpens your focus on budgeting, material selection, and long-term upkeep. This hands-on approach sets you up for a solid deck build with safety and cost-effectiveness in mind. Enjoy building your next project!
FAQ
Where can I find free deck planning resources like PDFs, checklists, and calculators?
The free deck planning resources provide downloadable PDFs, checklists, and calculators that guide you through design, material lists, and cost estimation for building a safe and functional deck.
What do free deck plans with roof include, such as 12×24 designs?
The free deck plans with roof include detailed designs like 12×24 layouts, incorporating roof integration, proper drainage, and material guidelines to help build a stylish and weather-protected outdoor space.
What is the 3/4/5 rule for decks?
The 3/4/5 rule for decks ensures that triangle measurements are proportional, verifying that corners are square using a 3:4:5 ratio, which comes from a basic Pythagorean theorem check.
How do I plan a deck layout?
The deck layout planning starts with measuring your property, sketching design concepts, assessing sun exposure and privacy, and finalizing dimensions while adhering to building codes and permit requirements.
How much would a 20×20 deck cost to build?
The 20×20 deck cost is estimated by analyzing material, labor, and permit expenses, roughly ranging between $15 and $35 per square foot, leading to an overall cost estimate of about $9,600 to $16,800.
Should I use 2×8 or 2×10 for deck framing?
The choice between 2×8 or 2×10 for deck framing depends on the span; the proper size is determined using span tables like the DCA-6 guide to ensure structural integrity and safety on longer spans.