
Have you ever thought about hanging your drywall vertically? This way, you cut down on waste and end up with fewer joints to finish later. By placing the 4-ft (1.2 m) edge against your studs, you reduce the number of seams and work more efficiently. Fewer cuts mean a stronger wall that’s ready for taping and mudding sooner. In this guide, we’ll take you through each clear step to get a clean, professional finish on your next drywall project.
hanging drywall vertically: Effortless, Clean Finish

Vertical drywall installation is a smart choice for rooms with ceilings that match standard sheet sizes like 4×8 ft (1.2×2.4 m), 4×10 ft (1.2×3 m), or 4×12 ft (1.2×3.7 m). The 4-ft (1.2 m) width lines up with studs spaced at 16 in (40.6 cm) or 24 in (61 cm) on-center. This method cuts waste and reduces extra cuts while giving you fewer joints to handle later.
Using a drywall lift or spring-loaded T-brace makes it easier to work solo. Follow these clear, step-by-step instructions to keep your work straight and secure. Soon, you'll have a sturdy wall with even seams ready for taping and mudding.
- Start in a corner. Hold the drywall sheet upright so that the 4-ft (1.2 m) edge matches the studs.
- Snap a chalk line on the studs to mark where the screw heads will go.
- Push the drywall snugly against the wall to ensure a tight fit along the stud line.
- Fasten the sheet with 1-1/8 in (28.6 mm) self-drilling screws. Place screws every 16 in (40.6 cm) on the studs and every 8 in (20.3 cm) along the edges.
- Use a drywall lift or T-brace to keep the panel steady if you're working alone.
- Drive screws so they sit ½ in (1.3 cm) from the panel edges. This helps prevent damage.
- If you use panels that aren’t full-length, cut the first board so the joint lands in the center of your layout.
- Press each sheet firmly against the wall to lock it in place.
- Check that every panel is level and aligned before fastening additional screws.
- For extra guidance, refer to the drywall installation steps at drywall installation steps.
Following these steps builds a durable, well-aligned wall that sets you up for a smooth finish during joint taping and mudding.
Essential Tools and Materials for Vertical Drywall Hanging
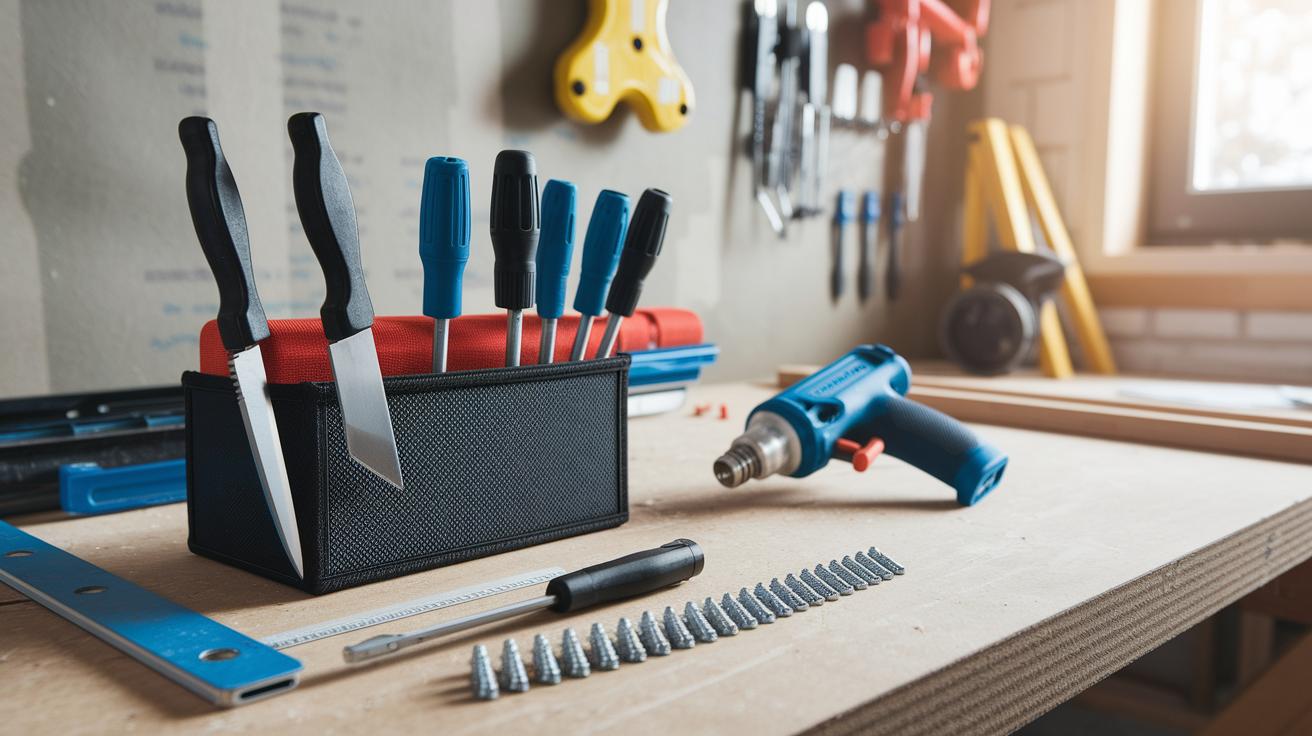
Getting the right tools and materials is key to a smooth drywall job. With quality gear on hand, you’ll work faster, cut down waste, and end up with a finish that looks pro.
Here’s a list of must-have gear:
- Utility knife – for clean cuts on drywall panels.
- Drywall T-square – to mark straight lines and guide your cuts.
- Screw gun or drill with a drywall bit – helps drive screws quickly. (For more power tool tips, see tools for drywall installation at neull.com?p=278.)
- 1-1/8 in self-drilling screws – designed to securely attach panels to studs and edges.
- Drywall lift or spring-loaded T-brace – lets you safely lift heavy sheets if you’re working alone.
- Chalk line – to mark neat, straight guidelines on the wall.
- Tape measure – essential for checking dimensions and aligning panels with stud spacing.
- Corner trowel – useful for smoothing finishing compounds on both inside and outside corners.
- Joint compound – fills seams and evens out surface bumps.
- Drywall tape – reinforces joints to help prevent cracks.
- Corner beads – create a sharp, durable edge along corners.
- Adhesives – can bolster the hold of screws for a tighter seam.
Choose good-quality tools that stand up to tough work. If your project budget is tight, consider renting high-end tools. With dependable, professional-grade gear, you’re set to tackle vertical drywall hanging safely and accurately.
Pros and Cons of Hanging Drywall Vertically

Hanging drywall vertically is a smart pick for DIYers and solo projects. The drywall’s height usually lines up with your ceiling, which means fewer cuts and less waste. But keep in mind that more vertical seams mean extra taping and finishing work to keep cracks at bay.
| Pros | Cons |
|---|---|
| Easy for one-person handling | More vertical seams need extra taping |
| Less cutting, less waste | Requires additional mudding and sanding |
| Drywall matches ceiling height | Seams are more visible |
| Faster overall placement | Higher risk of cracking under horizontal loads |
| Simplifies the installation process | Not ideal for busy, commercial spaces |
This method works best on standard home projects where the ceiling height fits the drywall sheet. If you value a quicker setup and easier handling, vertical hanging can be a good choice, even if it means putting a little extra effort into finishing the seams.
Layout Planning and Framing Considerations for Upright Panels

Before you start, plan out your drywall layout and check your wall framing. Good planning makes sure your panels line up neatly and seams fall where they’re easiest to finish. Take a close look at your studs and add shims where needed to create a level surface. Think of it as putting together a puzzle: every piece needs to fit perfectly.
- Measure your wall carefully. Plan your panel layout to cut down on butt joints at corners. Begin with the tightest, tallest wall so you follow the natural line of the space.
- Check the top plates with a level tool. Make sure every horizontal line is even.
- Confirm that your studs are spaced 16 in (40.6 cm) or 24 in (61 cm) on center. Consistent spacing means fewer surprises during installation.
- In spaces like basements or garages, inspect for moisture barriers and secure any anchor walls near the sills. Dry conditions keep your installation safe.
- Shim any uneven studs to maintain a straight and plumb surface for proper drywall attachment. For more details on stud alignment, review basic wall framing tips.
Following these practical steps ensures that your panels fit smoothly and last for years. Good planning and careful shimming translate to a smoother, more durable drywall finish.
Advanced Techniques and Troubleshooting for Vertical Drywall

When hanging vertical drywall, upgrading your methods can help you work faster and achieve a cleaner finish. These tips tackle common issues so your work stays straight, secure, and durable.
- When working on ceilings over 10 ft (3 m), use spring-loaded braces or jacks to support the drywall safely.
- Apply construction adhesive on studs to boost panel hold and prevent movement over time.
- Check for perfect vertical alignment by using a laser level. This makes sure your sheet edges line up evenly.
- For uneven walls, shim low spots with thin furring strips to create a flat surface.
- Strengthen seams prone to cracking by using mesh tape with hot-mud adhesive.
- In tight or hard-to-reach spots, use a T-brace or leverage tool to adjust the panels as you install them.
Troubleshooting is all about using the right tools and methods to fix problems as they come up. These advanced tactics help you solve alignment issues quickly and secure joints before they become bigger challenges.
Finishing Techniques for Vertical Seams and Corners
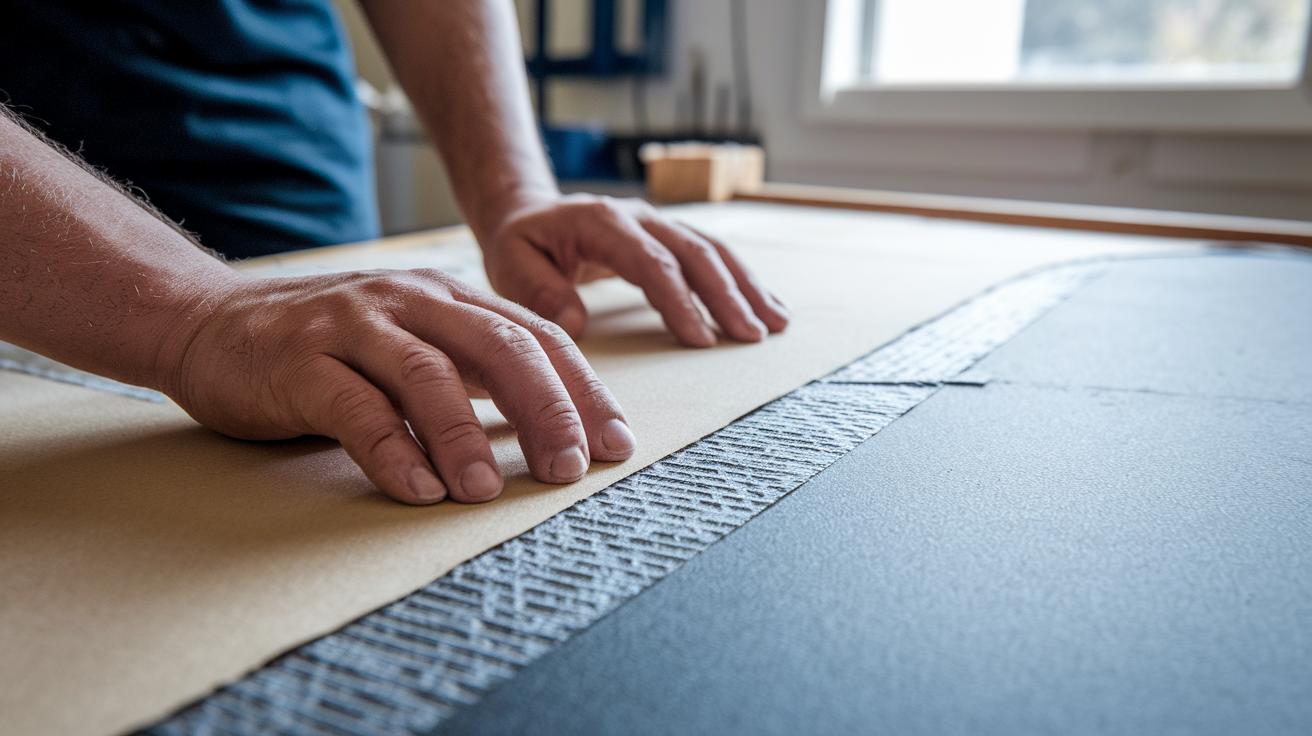
To get a clean, professional look on your drywall, start with the right tape and coating process. Apply paper or fiberglass mesh tape over vertical joints. This tape (or mesh tape) keeps the seams together and stops cracks. First, use a tape coat that spreads the compound 6 in (15.2 cm) around the tape to blend it in. Next, add a fill coat with compound spread 10 in (25.4 cm) to even out the surface. Finally, finish with a top coat feathered out 12 in (30.5 cm) for a smooth, uniform appearance.
For corners, install metal or vinyl corner beads on both inside and outside edges. These beads give you sharp and long-lasting corners. Sand the area with 120-grit paper to smooth out any bumps. In wet or humid spots, use moisture-resistant compound to help prevent future issues. This method combines careful seam treatment with solid corner reinforcement to give your walls a neat and durable finish.
Seam Finishing
Cover the taped seams with joint compound slowly and evenly. Let each coat dry completely before sanding or applying the next layer. This way, you ensure the compound sticks well and sits flush with the wall.
Corner Bead Installation
Set the corner beads tight against the drywall so they sit perfectly. Then, feather on the finishing compound over the bead to blend it with the wall and create a crisp edge.
- Start with a 6 in (15.2 cm) tape coat that smoothly embeds the mesh tape.
- Allow each coat to dry completely before moving on.
- Sand between coats with 120-grit paper for a fine, even surface.
- Choose a moisture-resistant compound in damp or humid areas.
- Install corner beads flush with the wall and blend the compound for a seamless, professional edge.
Safety Tips and One-Person Strategies for Vertical Installations

When hanging drywall panels on a wall by yourself, safety is your top priority. Always gear up with safety glasses, a dust mask, and gloves to keep dust and debris at bay. Keep your work area clean and use a T-brace (a support bracket) or drywall lift (a tool that steadies panels) to hold the panels in place. Plan your approach by setting your feet firmly, much like a stable tripod, and use a cordless screw gun for quick, flexible fastening.
- Put on safety glasses, a dust mask, and gloves to protect your eyes and lungs.
- Wear knee pads when working with panels close to the ground.
- Secure a T-brace or drywall lift so your drywall stays steady during installation.
- Use a cordless screw gun to move easily around the project area.
- Stand with your feet in a firm, tripod-like position to avoid back strain.
- Clear the work space of any debris to minimize tripping hazards.
- Begin each panel lift slowly to ensure it is stable before putting your full weight on it.
Final Words
In the action, you've seen how hanging drywall vertically can streamline your project. We broke down every step, from selecting essential tools and planning your layout to handling advanced techniques and safety tips. These clear, numbered instructions help you avoid common pitfalls and keep work efficient.
Keep this guide handy as you tackle your project. With careful planning, the right tools, and practical tips, you're set up for success and a smoother, cost-effective installation.
FAQ
What are the pros and cons of hanging drywall vertically?
The pros and cons of hanging drywall vertically include easier one-person handling, reduced waste, and faster setup, while drawbacks involve more vertical seams that require extra tape and finishing, increasing the risk of cracking.
How do you hang drywall vertically on a wall or ceiling?
Hanging drywall vertically involves aligning 4×8 sheets with studs, marking level chalk lines, and securing with 1‑1/8 in self-drilling screws, using a drywall lift to ensure safe and firm placement throughout the installation.
Can you hang drywall both vertically and horizontally, and how do you decide the orientation?
Choosing between vertical and horizontal drywall depends on project needs and framing layout; vertical minimizes waste in tall spaces, while horizontal can reduce visible seams and may improve durability in high-traffic areas.
Is it okay to hang drywall vertically on a 10-foot ceiling or in a basement?
Hanging drywall vertically on a 10‑ft ceiling or in a basement is acceptable if the stud spacing and conditions support it; however, extra finishing work may be needed on the vertical seams compared to a horizontal layout.
What is the proper orientation to hang drywall, and is there a wrong way to do it?
The proper orientation is to install sheets so that the long edge meets the ceiling and the 4‑ft side aligns with studs; improper placement can lead to misaligned seams and weak joints, compromising the finish.