
Ever noticed your garage floor looking plain? It might be more than just a parking spot. Upgrading with epoxy coatings, snap-together tiles, or vinyl planks can add curb appeal and create a tough, easy-to-clean surface. Whether you're diving into a DIY weekend or calling in a pro, you can transform your garage into a welcoming space. Read on for simple steps to revive your floor and boost your whole space.
Comprehensive Overview of Garage Flooring Installation

Make your garage shine with a flooring option that suits your needs. You can finish the job in one weekend using epoxy coatings, snap-together tiles, or vinyl planks. Each method has its perks. Epoxy creates a smooth, chemical-resistant surface; snap-together tiles come with non-slip, self-draining features; and vinyl planks are durable and moisture-resistant. Free online design tools and video guides can help you plan and execute your project step by step.
-
Epoxy coatings
- Pros: Smooth finish that repels stains and chemicals
- Cons: Takes 24–48 hours (1–2 days) to cure; larger areas might need professional help
- Tip: Apply two coats to ensure a durable, smooth surface.
-
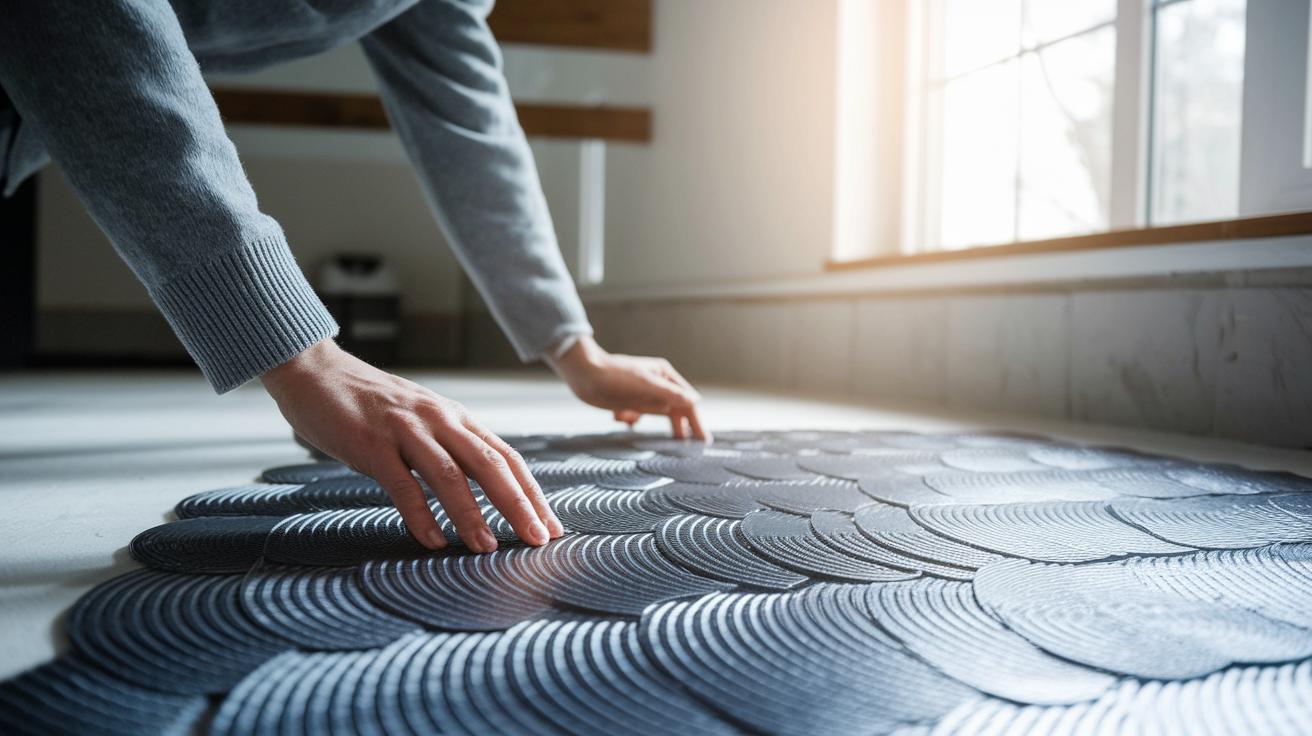
Modular snap-together tiles
- Pros: Non-slip and self-draining; easy DIY setup with 16 in (40 cm) x 16 in (40 cm) pieces
- Cons: Requires careful planning to use full tiles and hide small edge gaps
- Tip: Start at the garage door for a consistent look and quick installation.
-
Vinyl planks
- Pros: Tough, moisture-resistant, and great for DIY projects
- Cons: May need extra underlayment for best results
- Tip: Line up the planks with the garage framework for a clean finish.
Before you start, clear the space, use an online floor designer to plan your layout, and make sure you have all the needed tools. Then, follow the step-by-step guide for prep work, material application, and finishing touches to complete your project safely and efficiently.
Preparing and repairing your concrete garage floor

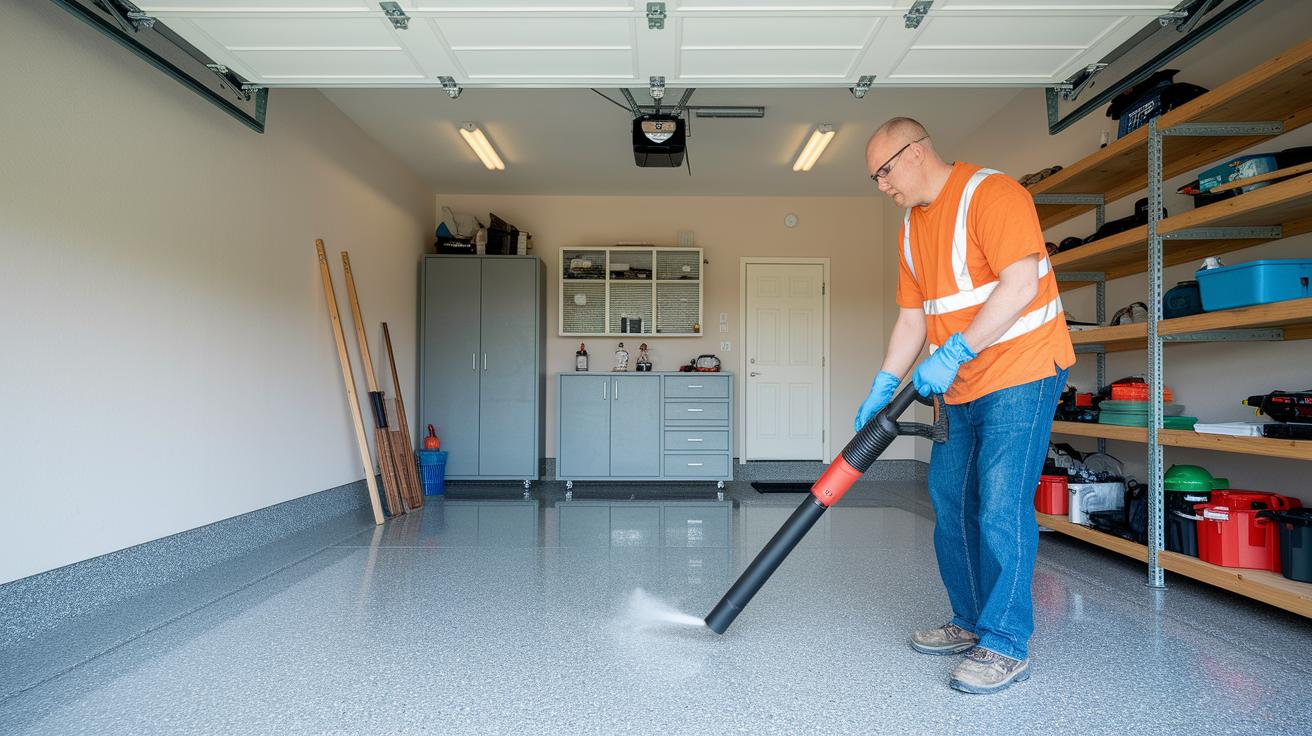
Start by clearing your garage to work safely. Remove clutter, old tools, and debris. Wear gloves and eye protection.
- Empty the garage – take out stored items, old tools, and any demolition leftovers.
- Sweep or use a blower to get rid of loose dust and dirt – a clean surface helps new materials stick better.
- Hose down the floor to remove stubborn grime. Let it dry completely to avoid moisture issues.
- Inspect the concrete for cracks and gaps – watch for any damage that might get worse over time.
- Patch visible cracks with a concrete filler. Follow the product’s instructions for mixing.
- Spread a self-leveling compound to form a smooth base – this readies the floor for a top finish like epoxy, tiles, or vinyl.
After these steps, check your design plan to ensure you leave proper expansion space. Always work in a well-ventilated area and let each layer dry fully before adding the next.
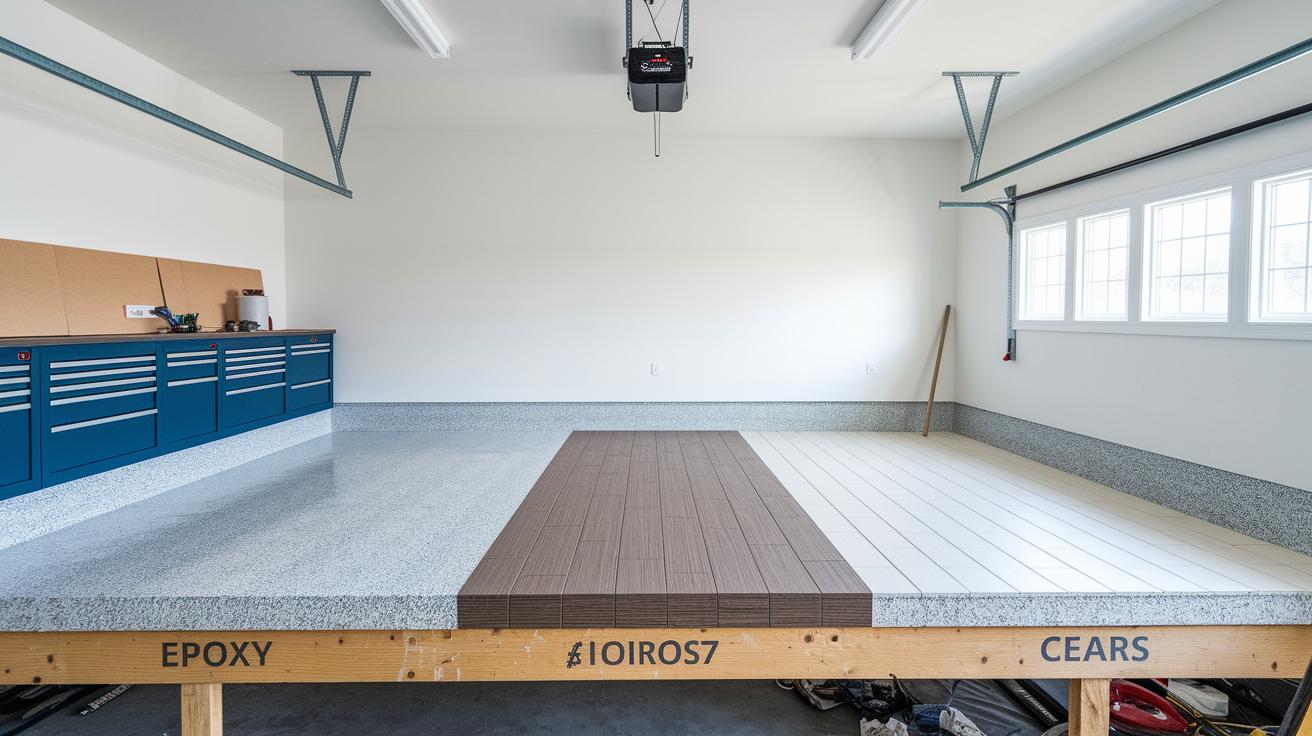
Comparing Garage Flooring Options: Epoxy, Tiles, and Vinyl

Epoxy coatings give you a smooth finish that stands up well against chemicals and stains. They cure in 24–48 hr (about 1–2 days) and require careful mixing, so they suit DIYers with some experience. Polyurea coatings cure much faster and offer excellent abrasion resistance but need professional spray equipment to work best. Epoxy DIY kits usually cost around $200–$600, while polyurea is a bit more expensive.
RaceDeck-style snap-together tiles come in a 16"x16" size (about 41 cm x 41 cm) with interlocking edges. These tiles cushion your floor and drain water naturally, hiding small gaps along the way. Vinyl planks, on the other hand, are tough and simple to install. They also have a built-in moisture barrier that keeps your floor safe. For more details, check out the vinyl plank flooring installation guide at this link.
| Material | Installation | Durability | Typical Cost |
|---|---|---|---|
| Epoxy coatings | Hands-on mixing; cures in 24–48 hr | High resistance to chemicals and stains | DIY kits $200–$600 |
| Polyurea coatings | Fast curing; needs professional spray equipment | Very high, with strong abrasion resistance | Slightly more than epoxy |
| Snap-together tiles | Simple interlocking design | Cushioned and self-draining to hide gaps | Moderate pack pricing |
| Vinyl planks | Easy DIY installation with moisture barrier | Durable and flexible | Budget-friendly per square foot |
Detailed Cost Analysis for Garage Flooring Renovations
When planning your garage upgrade, it's important to know your costs. For a typical two-car garage, you'll need to cover both materials and labor. Choose from epoxy, snap-together tiles, or vinyl planks, and balance cost with quality for a long-lasting finish.
| Floor Type | Material Cost | Estimated Install Cost |
|---|---|---|
| Epoxy coatings | $200–$600 (DIY kits) | $2–$6 per sq ft (if done by a pro) |
| Modular snap-together tiles | $15–$30 per pack | DIY-friendly with little extra labor |
| Vinyl planks | $2–$5 per sq ft | $2–$6 per sq ft for professional install |
Even if you know your material expenses, installation costs can vary. DIY options can save you money, especially with epoxy or snap-together tiles made for weekend projects. Look for package deals and bundled products to stretch your budget further. Also, factor in maintenance costs over time to get a complete picture of your investment.
Choosing DIY or Professional Garage Flooring Installation

|
|
When choosing between doing it yourself and hiring a pro, think about your budget, timeline, and skill level. If you have a detailed plan, a few weekends to spare, and confidence from watching clear video tutorials, the DIY route can save you money. But if your floor needs tough prep work, lots of patching, or if you want a fast, hassle-free install with warranty support, hiring a local professional is the smarter choice.
Step-by-Step DIY Garage Flooring Installation Tutorial

Cleaning & Prepping
- Begin by clearing your garage floor. Remove all stored items, old tools, and any debris left from previous work.
- Tip: Wear gloves and eye protection to stay safe while you work.
- Sweep the floor or use a blower. You can also hose it down to remove dust and dirt. Let the floor dry completely before moving on.
- Troubleshoot: If you still see moisture, wait an extra hour for the floor to dry well.
Layout & Alignment
- Start your tile layout at the garage door. Place your first 16 in (40 cm) x 16 in (40 cm) tile in an L-shape to set your starting point.
- Note: This initial tile helps guide all the other tiles.
- Mark the boundaries for your tiles using a chalk line or tape, and keep a 1/4 in (6 mm) gap for expansion between the tiles and any walls or obstacles.
- Tip: Check your online design to help keep the layout straight.
Locking & Trimming
- Secure the tiles with the PowerLock® system. Connect the loop and peg on each tile firmly.
- Tip: Make sure all the loops face the same direction for a neat look.
- After you finish a row, step lightly on it to confirm the tiles are locked tightly.
- Use a utility knife to trim the edge tiles so they fit along uneven walls or door rails. If a tile is not placed right, carefully remove it with a putty knife and set it back in place.
- Troubleshoot: You can fix small misalignments before you continue with the installation.
Curing & Final Checks
- Let any adhesive or epoxy cure as the manufacturer directs before you put any heavy items on the floor.
- Tip: Following the cure time is important for a strong, lasting bond.
- Do a final walk-through of your floor. Check for any loose or uneven tiles and make adjustments by re-locking or trimming them.
- Tip: Inspect all gaps and seams to ensure your floor is finished perfectly before use.
Maintenance, Cleaning, and Safety Tips for Garage Floors
Keep your garage floor in top shape with a regular maintenance schedule. Every three months, give your floor a check and clean to help your epoxy finishes, non-slip tiles, or waterproof surfaces last longer.
- Use a blower or vacuum at the end of each season to remove leaves, grit, and debris. For example, after a winter full of wet, packed leaves, a quick run with the blower clears the mess fast.
- Rinse the floor with a hose and mop it, especially on epoxy surfaces. This helps wash away oily residues that could make you slip.
- Always put on safety gloves and safety glasses when cleaning or making small repairs. These protect your hands and eyes from splashes and sharp edges.
- Look carefully for any cracks, chips, or lifted sections on the floor. For small cracks, use a concrete filler and self-leveling compound to smooth the area.
- If the floor feels less slip-resistant, add a non-slip topcoat. Keep a home maintenance checklist handy so you can check off regular tasks.
Regular care like this keeps your garage floor safe, neat, and ready to handle everyday use.
Design Ideas and Customizations for Your Garage Floor
Plan your tile layout to use as many full-size 16 in (40 cm) x 16 in (40 cm) pieces as you can. Arrange the tiles so that any cut pieces are hidden next to walls or cabinets. Try layout patterns that add interest and cover small trimmed edges. For a modern touch, add metallic epoxy swirls or a contrasting border. For example, you might treat one area with metallic epoxy to create graceful curves that catch the garage light and highlight your workspace.
Mix aggregates (small stones or grit) into your finish to boost texture and grip. This extra texture adds safety and brings an industrial feel to your garage. You can also give your floor a personal touch by using custom stencils or logos. Pair a neutral base with bright accent colors around the edges to create a look that is both inviting and practical.
Check out visual galleries featuring vibrant tile patterns, metallic finishes, and unique stencil techniques to spark your own design ideas.
Final Words
In the action, we covered key stages of garage flooring installation. We broke down how to prepare your concrete surface, compare methods like epoxy coatings, interlocking tiles, and vinyl planks, and presented a clear cost analysis.
• DIY vs. professional tips
• Step-by-step installation procedures
• Maintenance and creative design ideas
This guide empowers you to tackle your project safely and efficiently. Your next garage flooring installation can now be both cost-effective and rewarding. Enjoy transforming your space with confidence!
FAQ
Garage flooring installation near me
The garage flooring installation near me refers to local services that install various flooring options from epoxy coatings to modular tiles. These professionals assess your space and provide tailored installation schedules and expert advice.
Epoxy garage flooring installation
The epoxy garage flooring installation means applying a durable and chemical-resistant coating to your garage floor. This method seals cracks, resists spills, and creates a smooth finish that can boost your garage’s durability.
Garage flooring installation video
The garage flooring installation video offers a step-by-step visual guide on applying coatings or laying tiles. It shows cleaning the floor, aligning materials, and proper curing techniques, making DIY projects easier to manage.
Concrete garage flooring installation
The concrete garage flooring installation involves preparing a clean, level substrate by sweeping, patching cracks, and sometimes using leveling compounds. This ensures coatings or tiles adhere well, providing a more durable and attractive finish.
Garage floor tiles and how to install garage floor tiles
The garage floor tiles and how to install them describe a method using interlocking panels that snap together. This system requires a clean, level surface, and offers easy placement, removal, and lasting slip resistance.
Modular garage flooring
The modular garage flooring refers to snap-together tiles that offer a quick, DIY-friendly installation. They are lightweight, self-draining, and customizable to update or repair your garage floor without a major overhaul.
Garage flooring systems
The garage flooring systems encompass complete installation setups, including epoxy coatings, interlocking tiles, and vinyl planks. These systems are designed for durability, ease of cleaning, and resistance to spills and oil stains in busy garages.
How much does it cost to put flooring in a garage?
The cost to put flooring in a garage varies by product, labor, and DIY involvement. Prices range from around $200–$600 for an epoxy kit to professional installations costing $2–$6 per square foot, depending on your choice.
What type of flooring is best for a garage?
The type of flooring best for a garage depends on your needs. Epoxy provides chemical resistance and a smooth finish, modular tiles offer easy repair, and vinyl planks deliver a durable, DIY-friendly option to meet various requirements.
How much does it cost to pour a new garage floor?
The cost to pour a new garage floor includes expenses for concrete, labor, and site preparation. Professional jobs often cost more due to comprehensive preparatory work, with prices varying by region, project size, and materials used.
What is the best flooring to put down over concrete?
The best flooring to put down over concrete is usually an epoxy coating or interlocking modular tiles. These options bond securely to concrete, create a smooth finish, and resist damage from spills and everyday garage use.