
Ever wonder if a few simple changes could give your home a whole new look? Many think you need a pro to get quality finishes, but with a solid plan, you can achieve a professional touch yourself. Our guide shows you how to plan your design, choose the right materials, and nail every detail. With smart planning and clear steps, you can refresh your home while saving both time and money. Let’s get started and turn your space into a place that truly shines.
Essential DIY Interior Finishes Tips for Professional Results

Start by sketching your design and writing down every material you need. Think of this sketch as your blueprint. Make a detailed shopping list based on your design and plan to visit stores that carry most of these materials. For example, if you’re choosing a countertop and also looking at tiles, doing both in one trip can save time and let you compare products side by side. Make sure your Finish Schedule is permit-approved and lists every detail, from paint colors to grout spacing, such as 1/16 in (1.6 mm) versus 1/8 in (3.2 mm).
Set aside one or two full days to pick out samples by visiting a few stores under natural light at your job site. This helps you see how materials, colors, and textures work in your space. Take photos of each sample. For instance, snap a picture of a tile against your existing floor to check for style and consistency. These photos help clear up any misunderstandings later and serve as a handy reference when you finalize your choices.
Stay flexible during the process. As you compare samples, expect to make changes and refine your selections. If a backsplash tile isn’t working, don’t hesitate to try another option, it’s all part of keeping your vision intact.
Surface Preparation Fundamentals for DIY Interior Finishes
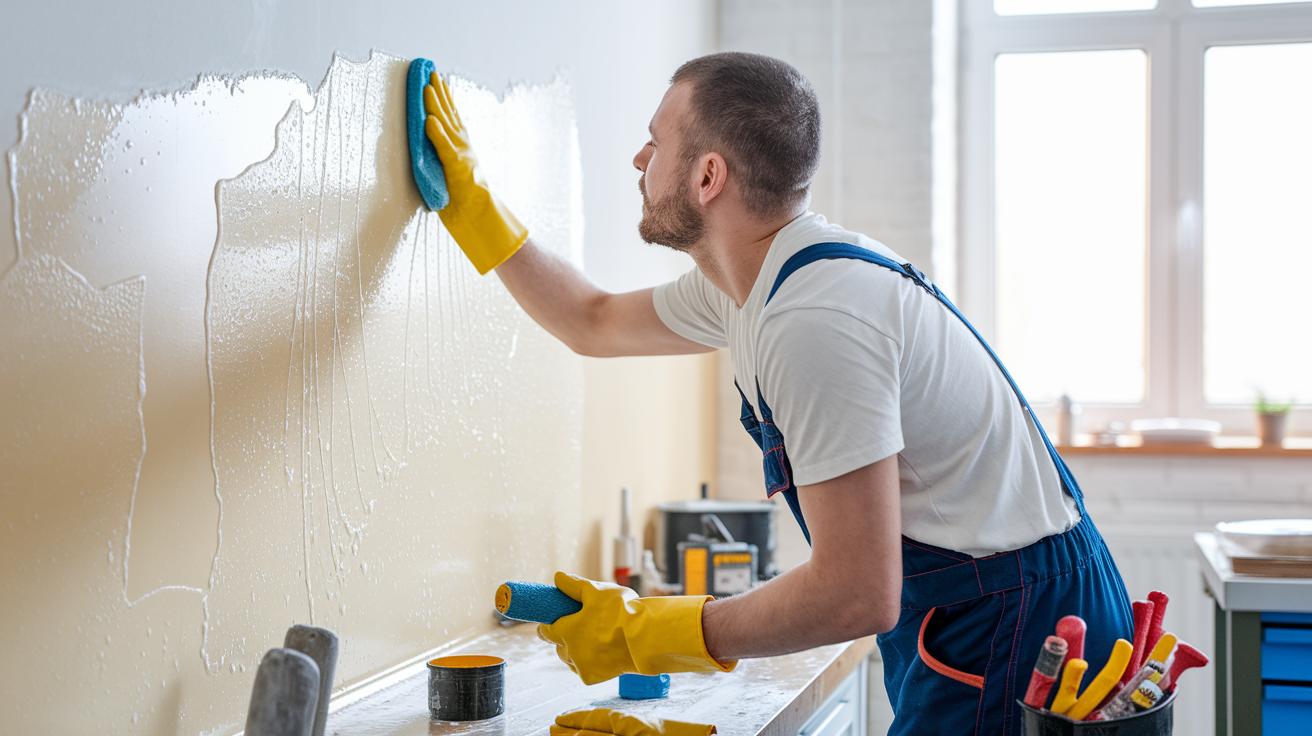
Start by washing your walls with a gentle soap or water-based degreaser (for example, dish soap in water) to remove cooking oils and fingerprints. This cleaning step makes sure the wall is clean, dry, and even so your paint or finish will stick better. Keeping your workspace neat helps stop excess dirt and grease from ruining your project.
Fix any dents or holes with care. For small spots, use lightweight, shrink-free spackle (a filler that doesn’t shrink when it dries). For bigger holes, choose joint compound (drywall filler) or wood putty. After your repairs have dried, smooth them out by sanding with 220-grit paper (about 220 grit, roughly 18 microns) to create a flat surface.
- Wash the walls thoroughly with a soap solution.
- Rinse and dry completely to keep out moisture.
- Apply shrink-free spackle on small dents.
- Fill larger holes with joint compound or wood putty.
- Sand all patched areas with 220-grit paper for an even texture.
Spot-priming is essential on nearly all repaired spots. Focus on glossy surfaces or areas where fixes have been made. Only prime the entire surface when you have drastic color changes or severe stains. This method saves materials while ensuring your finish adheres evenly for a smooth, professional look.
DIY Walls: Texture, Paint, and Accent Techniques for Interior Finishes
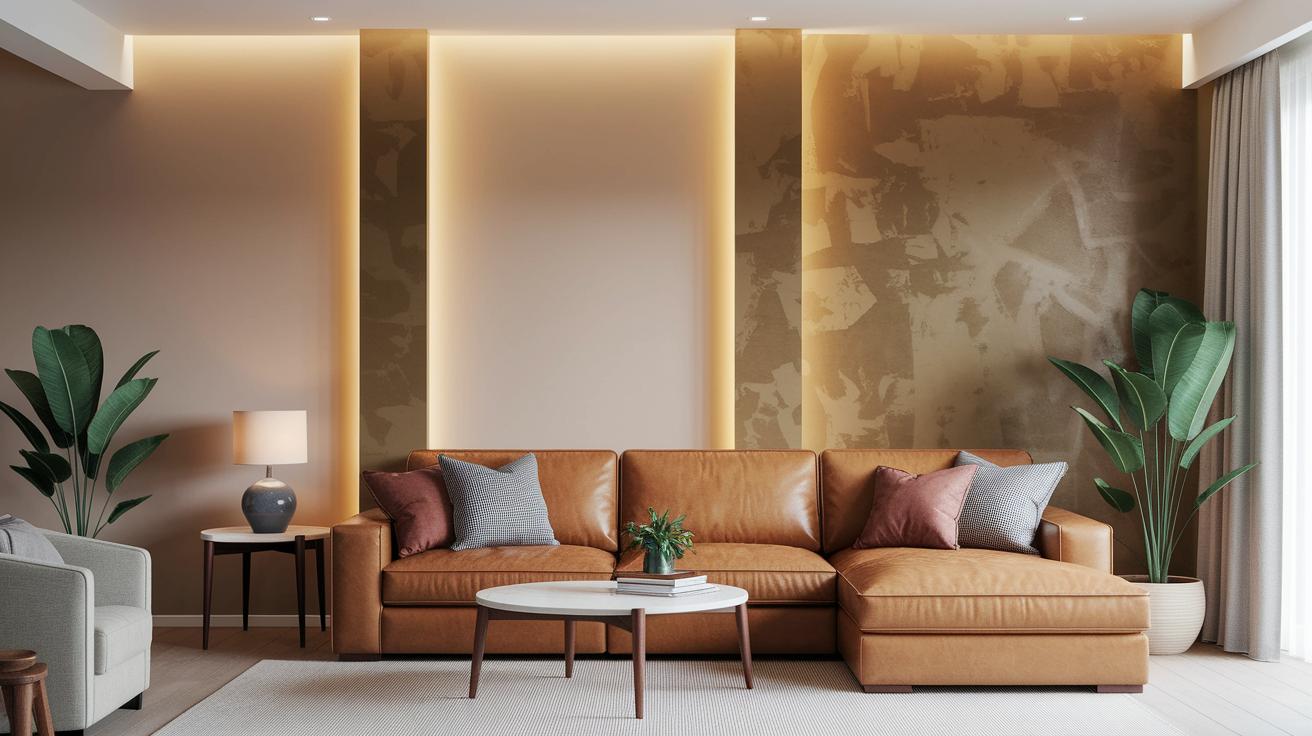
Drywall is a blank slate that lets you get creative with your wall finishes. You can choose a heavy, hand-troweled finish like Knockdown or a sleek, smooth look with Venetian plaster. Each finish creates a different vibe in your room. Try mixing things up with the edges too, a squared bead gives a sharp, modern look, while a rounded bead has a soft, Mediterranean feel. For more ideas on using textures and paint to change up your walls, check out the interior wall finishes link.
| Treatment | Description | Ideal Style | Estimated Cost per Sq Ft |
|---|---|---|---|
| Knockdown | Heavy, hand-troweled finish with soft peaks | Mission, Rustic | $2 – $3 |
| Monterrey Drag | Subtle texture with a medium finish that adds depth | Contemporary | $1.50 – $2.50 |
| Venetian Plaster | Smooth, lime-based finish with an iridescent look; waterproof options available | Mediterranean | $4 – $6 |
| Wallpaper | Printed paper, grasscloth, or foil that offers varied patterns | Traditional to Bold | $1 – $5 |
| Accent Wall Treatment | Non-drywall textures such as brick veneer effects | Urban, Industrial | $3 – $4 |
Mixing different textures and materials can create a unique look that lifts your home’s style. You might use a soft Monterrey Drag finish on your main walls and add an accent wall with textured wallpaper for a standout look. Small details like choosing squared or rounded corner beads can make a big difference in defining your style. Whether you’re working with standard drywall or exploring other options, blend finishes in a thoughtful way to match your personal design vision.
DIY Trim, Molding, and Cabinet Refinement Tips

Applied Molding & Wainscoting: Material choices, cutting and fastening tips
Applied molding and wainscoting add a classic feel to your room. You can choose wood, MDF (medium-density fiberboard), or PVC based on your budget and style. Measure carefully and cut accurately; any mistakes waste material and spoil the finish. For example, cut decorative panels so they fit snugly against the wall to create a smooth look. Secure each piece with the proper screw size to keep everything in place.
Tongue-and-Groove, Shiplap & Bead-Board: Spacing, alignment, and finishing techniques
Panels like tongue-and-groove, shiplap, and bead-board bring a farmhouse or coastal look to any space. Start by planning your layout to ensure even gaps and correct alignment. Use a spacer or guide to keep the gaps consistent. Test-fit a small section first to check your work before finishing the entire layout. Working slowly and double-checking often helps avoid misalignment.
Cabinet Surface Refresh: Sanding, primer selection, paint application, and hardware swap
Giving your cabinets a new look is a quick project. Begin by lightly sanding the surfaces to remove old finish and smooth out any bumps. Then, apply a primer suited for your cabinet material to help the paint stick. Next, use a durable, washable paint and a synthetic bristle brush to add an even coat. Finally, update the hardware, switching out knobs or pulls can make a big difference in transforming your space.
Flooring and Specialty Surface Treatments for DIY Interior Refurbishments

Tile flooring is a common pick for kitchens and baths. You can choose from colorful cement, sturdy porcelain, or natural stone to set the right vibe. When you check samples in natural light, notice how grout spacing like 1/16 in (1.6 mm) and 1/8 in (3.2 mm) can change the overall look.
Timber floors add warmth and charm. Choose a stain and a topcoat that both bring out the wood grain and protect the floor. Test a small area first to make sure the finish meets your style and durability expectations.
Epoxy coatings give concrete a sleek, glossy finish that suits modern spaces. Start by cleaning the concrete thoroughly and etching (roughening the surface) to ensure the epoxy sticks well. Then roll on the epoxy evenly to avoid bubbles and keep a smooth look. This process not only boosts durability but also gives your floor a fresh, vibrant look that can handle heavy traffic. Remember, careful surface prep and application are key to a professional finish.
DIY interior finishes tips: Boost Home Vibes
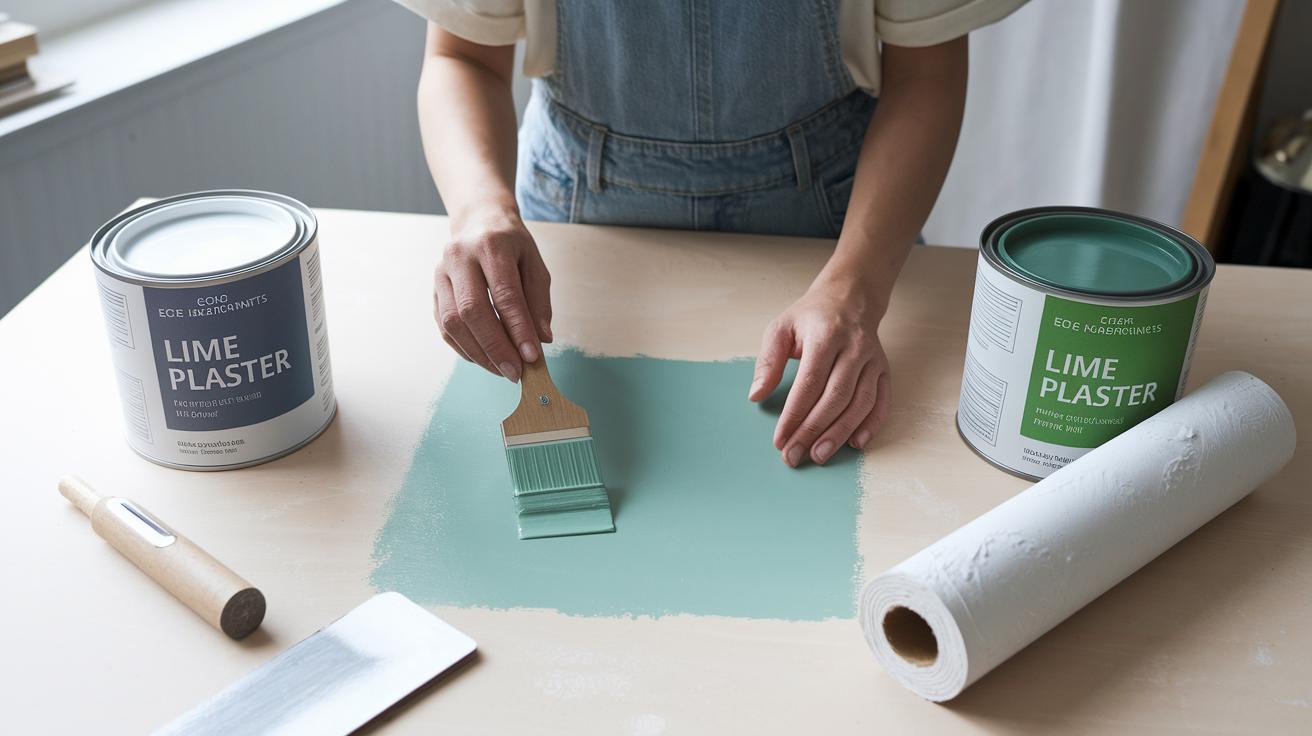
Use low- or zero-VOC water-based paints to improve indoor air quality and make your projects safer. These eco-friendly paints may take a bit of extra care when painting, but they leave a clean, fresh finish with fewer harmful fumes. You might also try lime-based Venetian plaster for a natural, long-lasting finish free of harsh chemicals. Test a small patch on a wall (for example, a 1 ft x 1 ft area / 30 cm x 30 cm) to see if it fits your space.
Premium products can cost a little more upfront, but they give you better coverage, easier cleaning, and a longer life than budget options. Think of it like buying a dependable tool, a small extra spend now can save you time and money later by reducing the need for constant touch-ups or replacements.
Plan your budget early to avoid overspending on things like primer, drop cloths, and disposal fees. Make a list of all your expenses and factor in some extra for waste. This planning not only keeps you on track with your financial goals, it also helps you achieve your eco-friendly targets while giving your space a great, lasting finish.
Final Words
In the action, this guide walked through design ideas, precise material selection, and surface preparation, all the way to detailed wall, trim, and flooring treatments. We broke down sample comparisons, accurate grout spacing, and cost-saving eco options. Each section offers practical DIY interior finishes tips to help you achieve professional results safely and affordably. Stay flexible and precise with your plans, and remember: every step brings you closer to a refreshed, inviting home. Enjoy the process and take pride in your handiwork.
FAQ
What are some DIY interior finishes tips and tricks?
DIY interior finishes tips and tricks include planning your finish schedule, comparing samples under natural light, and documenting selections. These steps guide you to achieve professional results while keeping the project cost- and time-efficient.
What interior design tips and ideas work for beginners on a low budget?
Interior design tips for beginners focus on using simple, affordable finishes and accent walls. By repurposing items and planning carefully, you can create stylish spaces without overspending.
How do home interior design images help with planning your project?
Home interior design images offer clear examples and inspiration. They help you visualize finish options, color schemes, and furniture layouts before you start your DIY project.
What is the 3-5-7 rule of decorating?
The 3-5-7 rule of decorating means grouping decorative elements in sets of three, five, or seven, creating balanced visual appeal and a cohesive look in your space.
What do the 70/30, 3-4-5, and 60/40 rules in interior design signify?
The 70/30 rule directs 70% of your design to a dominant theme with 30% accents. The 3-4-5 rule uses geometric proportions for balance, and the 60/40 rule divides space between primary pieces and complementary decor for harmony.