
Ever wonder if you can build a stone wall that stands strong and enhances your yard without overspending? This guide shows you how to create a durable wall using practical, step-by-step techniques.
We start with a solid base in compact soil and work up to arranging both large and small stones to ensure every row stays level and secure. With clear, straightforward tips, you can complete this project in just one day.
Follow these simple instructions to build a stone wall that’s built to last and boosts your outdoor space.
Stone Wall Construction: A Step-by-Step DIY Guide
Start by getting your site and plan in order. Remove 8–10 inches (20–25 cm) of topsoil to expose the hard, well-draining soil required for a solid base. Next, firmly mark your wall’s endpoints by placing stakes and stretching a string line between them. For any curves, run a ½″ (1.3 cm) conduit or plastic tube along the line to guide your layout.
Once your site is marked and the base is prepared, begin the build. Lay a steady foundation using large stones, then tuck in smaller stones as shims (small pieces used to keep the pieces in place). Make sure every row stays level by checking with a spirit level and your string line. Keep your best corner stones handy for extra strength, and finish the wall by topping it off with flat coping stones at about 30″ (76 cm) high.
- Clear away 8–10 inches (20–25 cm) of topsoil to reveal compact subsoil.
- Stake the wall endpoints and stretch a string line; use a ½″ (1.3 cm) conduit or tubing for curved sections.
- Lay a base row of large stones, setting most of the weight to the back.
- Insert smaller stones as shims to secure the large stones.
- Check each row for level and plumb with a string line and spirit level.
- Set aside your best corner stones for added stability.
- Continue layering the stones, tilting each row slightly inward to distribute weight properly.
- Cap the wall at around 30″ (76 cm) with flat coping stones for a neat finish.
A determined DIYer can typically build about 8 ft (2.4 m) of a 2.5-ft (76 cm)-high wall in an 8-hour day, handling nearly 2 tons (1,800 kg) of stone. Follow these steps for a masonry project that is built to last.
Planning Your Stone Wall: Design and Layout Essentials
Begin by figuring out what you want your wall to do. Will it hold back soil as a retaining barrier or serve as a freestanding landscape accent? Check the slope of your site, uneven ground can affect how stable your wall is and how well water drains away. Knowing these points up front steers your design in the right direction and helps avoid expensive fixes later.
- Decide if your wall is retaining (supporting soil) or freestanding.
- Look at the slope to see if you need extra reinforcement.
- Mark curved wall paths using stakes and a flexible conduit (a bendable tube used to guide layout) for a more precise design.
- Measure your wall’s length, width, and height in feet (ft) and in meters (e.g., 10 ft [3 m]) and plan routes for natural drainage to prevent water build-up.
Before you start, review local codes and permit rules to ensure your design meets safety and zoning standards. Make sure your plan addresses any steep slopes or poor drainage spots. Good planning today saves time and keeps surprises at bay, so your wall not only looks great but stays strong for years to come.
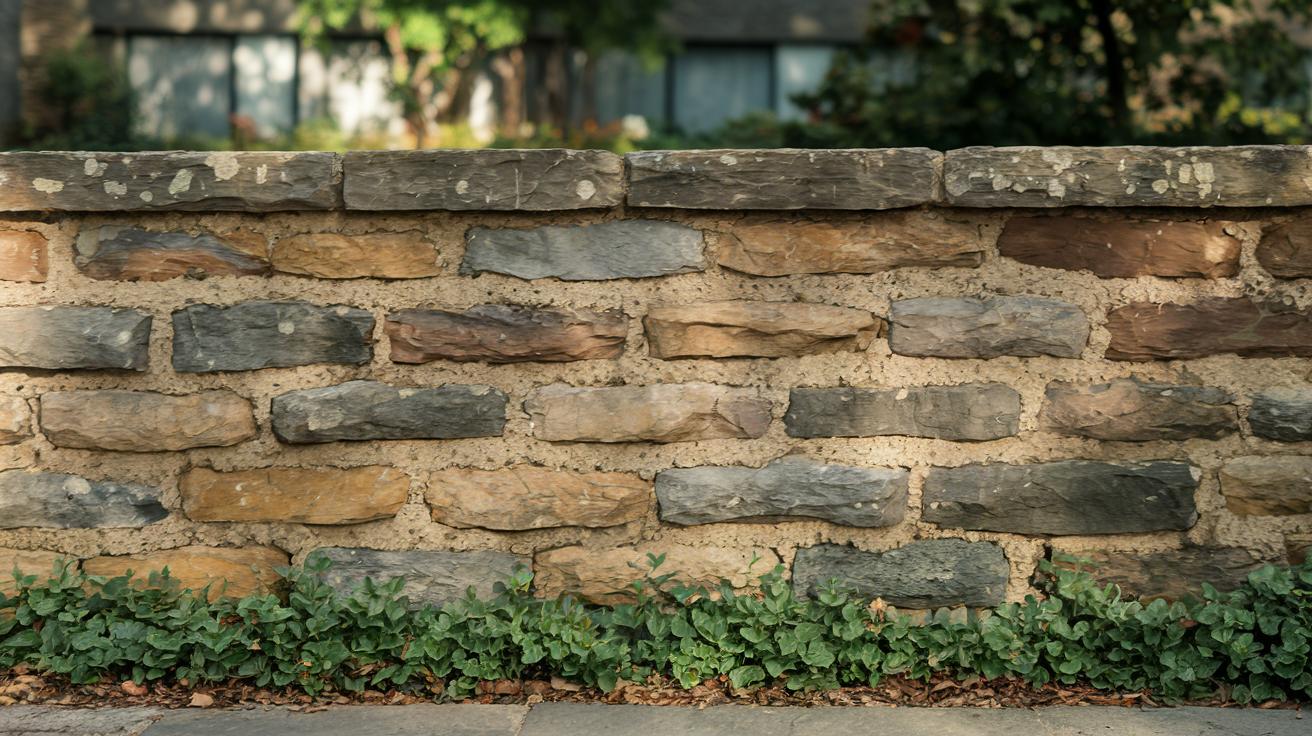
Selecting Stone Materials for Your Wall Build
Choosing the right stone is key to building a sturdy and attractive wall. There are two stone types: weathered stone, which is rough and can have bits of moss, and unweathered stone, which is smooth and comes in brown or tan. Both bring a unique texture that boosts your wall’s look and performance.
• Compare stone types – Weathered stone gives your wall a rugged, natural look with small moss bits, while unweathered stone offers a consistent, smooth surface in brown or tan.
• Source wisely – Look to salvaging stone from your own property or nearby building sites wherever you can, or buy locally to lower costs and save energy.
• Calculate volume needs – Measure your wall’s length, width, and height (in feet and meters) and use this formula: (Length × Width × Height) ÷ 27. This gives cubic yards (each cubic yard is about 0.76 m³) and roughly 1.5 tons (about 1.36 tonnes) of stone per cubic yard. Plan your stone volume like you would measure ingredients for a good, sturdy recipe.
Remember, the color of your stone is important too. Lighter stones help your wall blend with nature, while darker shades make a bold statement. Mixing colors can add visual interest and help the stones lock together reliably.
Stone Wall Tools and Equipment You’ll Need

When you build a stone wall, having the right gear makes all the difference. Using proper tools helps you work faster, stay safe, and get the job done right. This list covers common hand tools you might already own along with a few special items for the harder jobs.
| Basic tools | Specialty gear |
|---|---|
|
– Stone hammers – Chisels – Level – String line – Tape measure – Shovel |
– Masonry trowel (used to spread mortar on stones) – Rubber mallet – Wheelbarrow |
Always wear eye protection and sturdy gloves. Use these tools carefully and follow safe work practices to help prevent injuries on your site.
Preparing the Site for a Stone Wall Foundation
A stable stone wall starts with a firm base. Remove the topsoil to reveal the tougher, well-draining subsoil below. This creates a solid anchor that holds the wall in place and wards off water damage.
- Dig out 8–10 in (20–25 cm) of topsoil until you reach the sandy or stony layer.
- Compact the exposed area with a plate compactor or a hand tamper to ensure a tight base.
- Grade the soil so it slopes away from the future wall. This channels water away.
- Use a level to check the slope and adjust for a smooth, gradual decline.
Before beginning, check for underground utilities. Water and sewer lines typically run at least 3 ft (0.91 m) deep, while gas and electric lines might be as shallow as 18 in (46 cm). Always follow local guidelines and clearly mark any utility lines to avoid accidents. This careful prep work not only protects your workspace but also ensures your stone wall lasts.
Dry Stacking vs Mortared Stone Wall Techniques
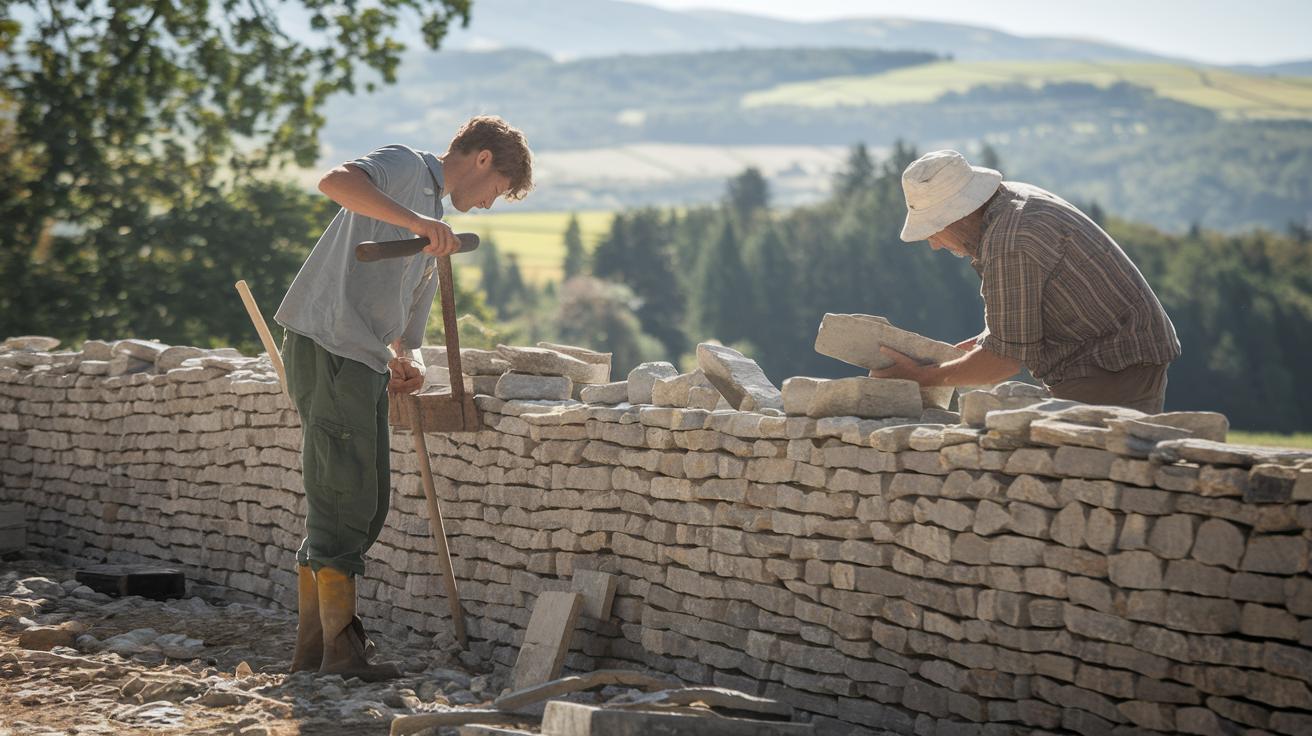
There are two main ways to build a stone wall. One method, dry stacking, depends on the natural grip and careful fitting of each stone to hold the wall together without any glue-like mortar. With this approach, you must choose each stone with care and wedge in small stones (shims) to lock the joints. In contrast, mortared walls use a binding mix such as sand-cement or earth plaster to set the stones. This method gives extra strength but takes more skill to mix and apply the mortar correctly. Whichever way you choose, you will still need to set some stones back into the wall to secure the structure.
| Aspect | Dry Stacking | Mortared Masonry |
|---|---|---|
| Key Steps |
– Select matching stones carefully – Position stones to take advantage of natural friction – Use small stones (shims) to secure the joints – Tie back stones for extra hold |
– Prepare and apply a sand-cement or earth plaster mix between stones – Arrange stones in a set pattern – Insert shims and tie back stones as needed – Smooth out joints with a trowel for uniform lines |
| Material Needs |
– High-quality, well-shaped stones – No additional binders needed – Fewer extra materials make clean-up simpler |
– Tools for mixing and applying mortar – Accurate proportions for sand-cement mix or earth plaster – More time for mortar curing and finishing touches |
Deciding which method to use depends on your skill set, design plans, and project needs. Dry stacking offers a simpler, more traditional look with fewer materials but calls for careful stone selection and placement. Mortared masonry may be more labor-intensive but can offer a smoother finish and added stability when the job calls for it. Choose the method that matches the style and effort you want to put into your project.
Building the Stone Wall: Base and Course Laying
Setting the Base
Start by placing the biggest, most solid stones on well-compacted soil. Make sure each stone lies flat on one side so it makes good contact with the ground. Use a spirit level (a tool that checks if surfaces are flat) and a string line to spot any low areas that might weaken the wall. For instance, run a spirit level across each row and check that every stone sits evenly before moving on.
Laying Successive Courses
For each new layer, set the stones with a slight backward tilt to help push the weight into the wall. Fill gaps with smaller stones (hearting, which are filler stones that lock the larger boulders in place) for extra stability. Use a spirit level and string line for every layer, making sure the stones line up plumb (perfectly vertical) and even. Adjust the stones as needed until each course builds a solid, load-bearing wall.
Finishing a Stone Wall: Capping and Aesthetic Details
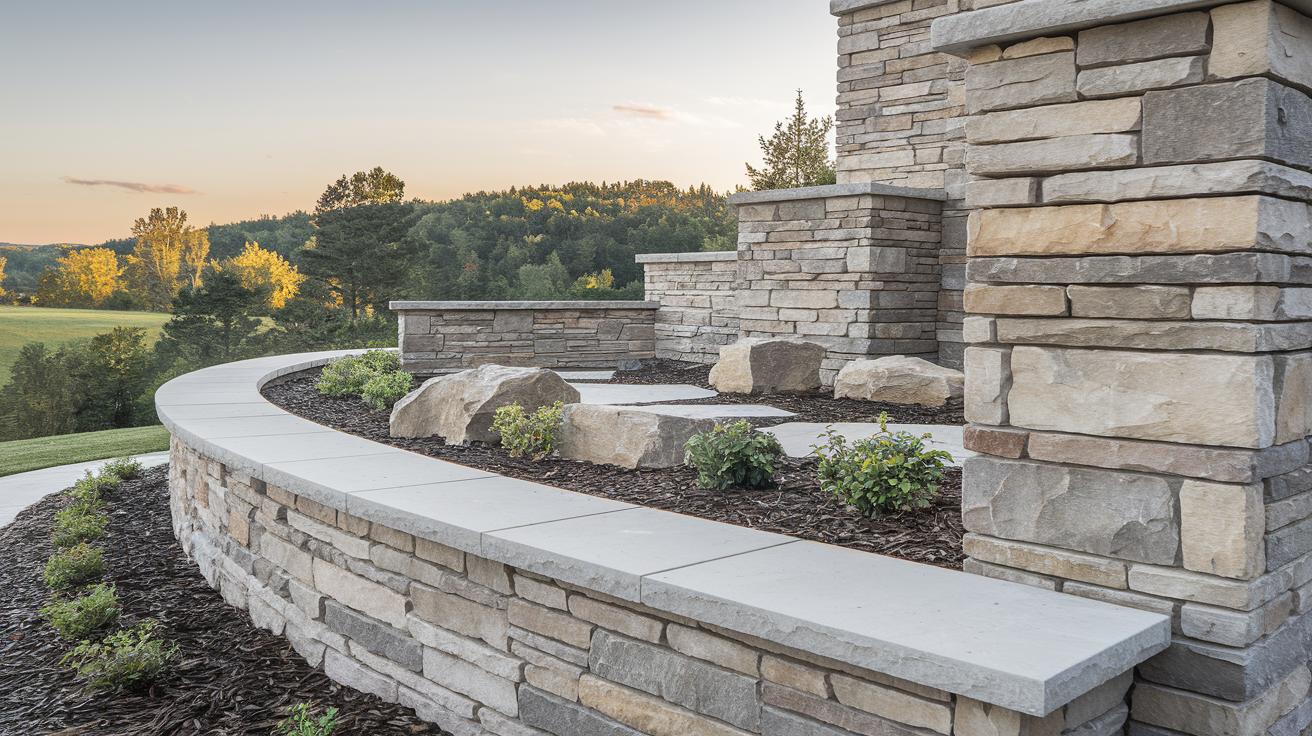
A stone wall isn’t finished until it has a neat cap and thoughtful details. A flat coping stone cap not only looks clean but also defends the wall against water damage. Here’s how to give your wall that strong, lasting finish:
- Select flat coping stones to form a consistent, uniform cap that matches your wall’s style.
- Smooth or shape the joints to create a slight dip. This concave curve helps water run off quickly.
- Place a few accent stones in strategic spots to add a spark of visual interest.
- Mix in natural rock features to break up large sections and bring extra character.
- Add detail with tool-marked joints that serve both a decorative and functional purpose.
Pay close attention to these finishing touches. A well-capped wall with proper drainage not only stays strong but also stands out in your landscape.
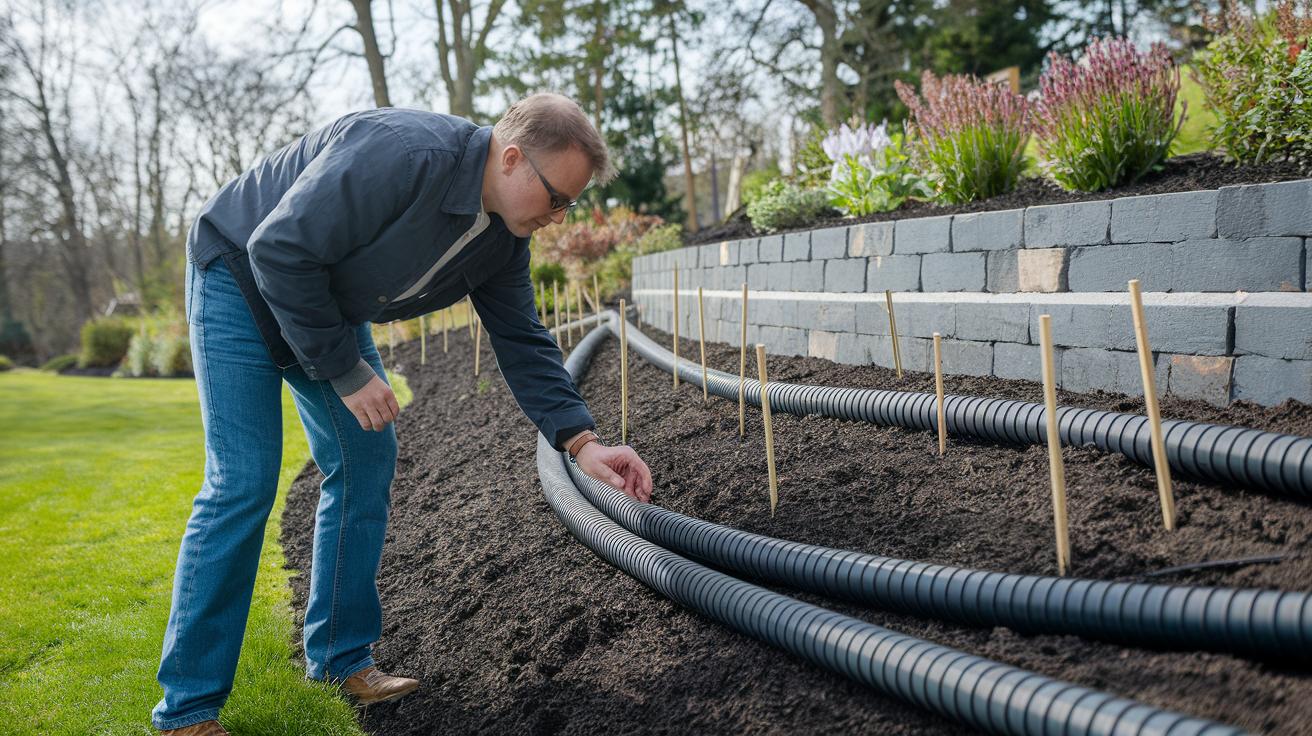
Integrating Drainage and Erosion Control in Stone Walls
Managing moisture is key to keeping your stone wall solid. Water that seeps in can weaken the wall over time. A good drainage system not only protects against water damage but also stops soil from washing away. Here’s how to set it up with simple, practical steps:
- Backfill with coarse gravel or crushed stone (small rock pieces) to guide water away from the wall base.
- When retaining soil, install a perforated drain pipe (a pipe with holes for water flow) behind the base to boost drainage.
- Lay geotextile fabric (a strong material that prevents soil from clogging the drainage layer) between the soil and gravel.
Freeze-thaw cycles can damage your wall if water gets trapped and then freezes. When water freezes and expands, it puts pressure on the stones and mortar. Keeping the drainage system free and clear stops water from building up behind the wall. This way, your wall stands up to heavy rains and shifting temperatures, lowers erosion, and stays a durable, attractive part of your landscape.
Stone Wall Maintenance and Longevity Strategies
A stone wall that lasts looks good and stays strong with regular care. Set up a simple plan to check your wall twice a year. Look for any loose stones or signs that the mortar (the cement-like mix holding the stones together) is worn out. Catch small issues early so they don’t turn into big repairs. Also, clear away weeds and exposed roots that can damage both the face and base of the wall.
- Inspect the wall every six months. Look for loose stones and cracked or worn mortar.
- If you see movement, especially after a freeze-thaw cycle (frost heaves), re-point the mortar or reset the stones to stop further shifts.
- Remove any weed growth, overgrown vegetation, or invasive roots from the wall’s surface and base.
- Fix small cracks or reset misaligned stones right away to keep the wall stable.
After storms or other harsh weather, add one extra safety check to catch unexpected damage. This simple routine helps keep your stone wall a secure and attractive part of your yard for many years.
Estimating Cost and Budgeting for Your Stone Wall Project
Start by figuring out exactly how much stone you need and planning your worker pace. This helps set a clear budget and prevents surprises later.
- Calculate the stone volume. Multiply the wall’s length, width, and height (all in feet) and then divide by 27 to get cubic yards. Each cubic yard holds about 1.5 tons of stone.
- Remember that an average worker can build 8 ft (2.4 m) of a 2.5-ft (0.76 m) high wall in an 8-hour day. That means a worker handles roughly 2 tons of stone daily.
- Check local stone prices to see how much each ton costs. Prices vary by stone type and what’s available, so use real numbers for a solid forecast.
Also, add a little extra to your budget. Plan to spend 10–15% more than your estimate for unexpected needs like extra stone, tool fixes, or site changes. This buffer keeps your project moving forward even when surprises pop up.
Final Words
In the action, we broke down every phase of your stone wall project, from prepping the site and choosing the right materials to laying courses and finishing with proper drainage and maintenance tips.
We detailed the steps to manage cost, safety, and workmanship so you feel secure during the build.
Follow these clear, practical guidelines to build a stone wall and tackle your project with confidence and a solid plan in place.