
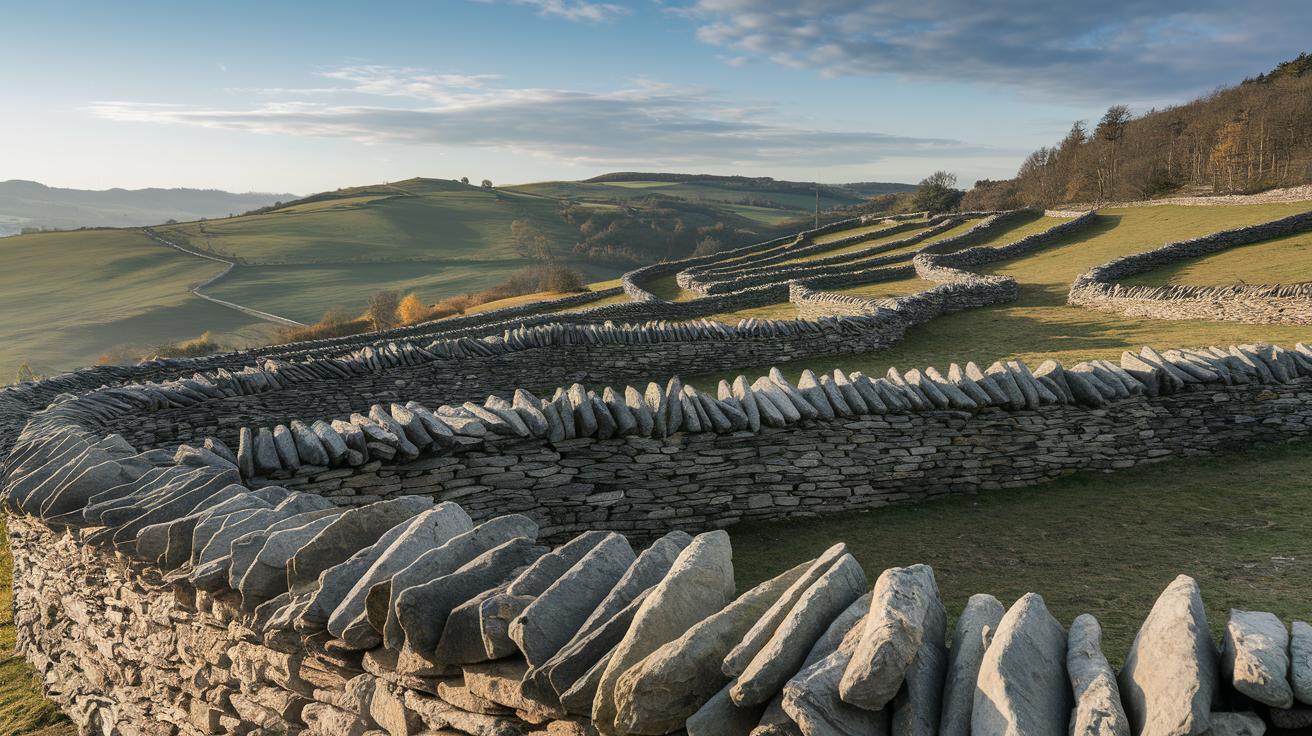
Have you ever wondered if an old building method could still beat modern techniques? Dry stone masonry uses carefully chosen stones that fit together without mortar. This classic technique lets water move freely through small gaps, which helps reduce pressure during heavy rain. Each stone blends art with solid engineering to create a structure that's both sturdy and appealing. Dry stone work shows that building with nature is not only practical but also a form of art that lasts.
Understanding Dry Stone Masonry: Definition and Key Principles
Dry stone masonry builds walls and other structures by carefully selecting and fitting stones together without using any mortar. Builders rely on gravity and the precise interlocking of stones to keep the wall stable. In fact, ancient builders used only simple hand tools to create walls that still stand today.
A big plus of dry stone masonry is its flexibility. Since no mortar is used, water can flow through the gaps, reducing pressure during heavy rains and letting the wall adjust to slight ground movements.
This method uses crossing joints (stones placed over one another to lock tightly) to hold the structure firm. The design permits natural drainage, which helps prevent water buildup that could weaken the wall over time. In 2018, UNESCO recognized this skill as an intangible cultural heritage, highlighting a tradition that has been passed down for thousands of years. Today, dry stone masonry is chosen for many applications, from retaining walls to patios, because it offers a blend of robust construction and natural drainage with a classic look that lasts.
Historical Origins and Cultural Significance of Dry Stone Masonry
Dry stone masonry has deep roots. Ancient builders in Ireland, Scotland, and the Mediterranean used stones found nearby to create sturdy walls and structures. They relied on gravity and careful stone placement instead of any mortar.
Across the United States, regional styles keep this craft alive. In Pennsylvania, New York, Delaware, and Maryland, many stone walls stand strong even after many years. One great example is the Montreat Big Wall, which reaches 7 ft (2.1 m) high and is built from local fieldstone. This wall shows that good design and solid function are possible without cement. In 2018, UNESCO named dry stone walling as part of our intangible heritage. This honor reminds us that these old methods mix art with engineering and serve as a cultural treasure.
Local groups and preservation projects continue to support dry stone masonry. They offer workshops, community projects, and classes to pass these traditional skills on to new generations.
Essential Materials and Tools for Dry Stone Masonry
Start by choosing stones that naturally fit together. Look for stones that lock into place for both strength and a pleasing look. Every stone has its own key role in keeping your wall stable and attractive.
Here are the main stone types you need:
- Cap stones – About 14 in (35.6 cm) deep and 3 to 6 in (7.6 to 15.2 cm) thick. They secure the top of your wall.
- Corner stones – Ranging from 14 in (35.6 cm) to 24 in (61 cm) long to form a strong 2 ft (0.61 m) base at the corners.
- Through-stones – Long enough to link the front and back of the wall.
- Face stones – Set so their length goes into the wall for a better appearance.
- Pins/shims – Small chips used to steady stones and correct any wobble.
- Larger rubble – Placed at the back to provide balanced support.
- Hearting – Fist-sized pieces (about the size of a closed hand) shaped with a hammer and chisel to fill gaps inside the wall.
Using the right tools matters just as much as choosing the right stones. Good tools make it easier to shape, position, and secure each stone for a solid build. A mason’s hammer and chisel help you trim stones accurately. A shovel and rake are important for preparing the site and cleaning up loose material. Materials like wood or rebar (steel rods) are used to build a batter frame, a guide that keeps the wall’s slope consistent and strong.
The basic tools you need include:
- Mason’s hammer
- Chisel
- Shovel
- Rake
- Wood or rebar for the batter frame
- Wheelbarrow
Keep your tools in top condition by cleaning and sharpening them regularly. This ensures precision and safety throughout your project.
Step-by-Step Dry Stone Wall Construction Guide

-
Site Preparation
Clear the area by picking up any large debris by hand. Use a rake to sweep away small stones and level the ground. Removing loose rocks and unwanted plants early gives your wall a firm start and prevents settling later.
-
Establishing the Batter Frame
Set up a batter frame using wood or rebar to help shape your wall. This frame creates a slight backward slope (batter) that keeps the wall stable. It serves as your guide so every layer leans correctly.
-
Laying the Foundation Trench
Dig a trench about 12 in (30.5 cm) deep for the base. Place your largest stones into the trench firmly to build a solid, level foundation. A strong base is crucial for a long-lasting wall.
-
Building the Wall Body
Start by placing the larger base stones. Then add hearting stones (roughly fist-sized pieces shaped with a hammer and chisel) to fill gaps and lock the stones together. Each stone should overlap its neighbor’s joints, like a puzzle where every piece supports the next.
-
Installing Coping Stones
Set coping stones on top so they extend past the wall. These big stones channel water away and protect the wall from weather damage. Lay them evenly and squarely with the base to boost both the look and strength of your wall.
-
Final Inspection and Adjustment
Review your work to spot any loose stones. Tighten them with small pins or shims as needed. Check that all layers line up and that the wall keeps its intended slope. This final pass makes sure your wall is secure and true.
Structural Principles and Design Variations in Dry Stone Masonry
Dry stone masonry uses gravity and a builder's skill instead of mortar to create a strong wall. Stones are stacked with crisscross joints that lock them into place, reducing movement when the ground shifts. It is important to set each stone deep into the wall rather than just laying it on top. This method increases the contact between layers and makes the wall stronger. Adding a slight backward slope (batter) helps the wall hold back soil and lowers the risk of collapse.
There are two common ways to build these walls. Single-faced walls show off carefully chosen face stones, with coping stones lined up on top to guide water away. The double-wall design uses both an inner and outer layer for extra support by interlocking more stones. These design choices mix old-fashioned building skills with smart modern techniques to create sturdy, long-lasting walls that move with the earth.
Modern Applications and Sustainable Benefits of Dry Stone Masonry

Dry stone walls add beauty to your yard while keeping soil in place on slopes and easing erosion. They form solid terraces for garden beds and slow down water run-off during heavy rains. Think of it as a wall that divides your property and naturally filters rainwater into the ground.
Using local or repurposed stones makes your project eco-friendly. When you choose stones from nearby or reuse stones from old structures, you cut down on transport energy and help save natural resources. This method lowers your project’s carbon footprint and gives your wall a unique, rustic look that blends with the natural surroundings.
Today, many garden designs incorporate dry stone masonry to create outdoor spaces that are both attractive and practical. This approach delivers innovative, functional, and sustainable landscapes.
Dry Stone Masonry Maintenance and Repair Techniques
Routine check-ups keep your dry stone wall safe and strong. Look for loose or broken stones early so you can address issues before they become big problems.
To fix things, replace any damaged stones with ones that match in size and shape. If a stone wobbles, use small pins or shims (small adjustment pieces) to secure it. Clear away debris from the joints and drainage paths to stop water from pooling and freezing, which can harm the wall. Regularly inspect for any shifting or wear, and remove any blockages to keep water flowing as it should. These steps help lower stress on the wall and maintain both its strength and look.
Stick to a regular maintenance schedule, and your dry stone wall will keep its classic charm and durability for many years without needing mortar.
Final Words
In the action, this guide broke down dry stone masonry into simple, practical steps. We covered everything from the principles of no‐mortar assembly and material choices to essential tools, construction techniques, and upkeep tips.
Each section gives clear instructions to build walls that are safe, durable, and flexible. Follow these steps to keep your project on budget and achieve results that last.
Keep safety first and enjoy the process of building something that stands the test of time.
FAQ
Q: Dry stone masonry near me
A: Dry stone masonry near me indicates local specialists who build and repair walls using traditional, mortar-free methods. Check local directories or community listings for experienced practitioners.
Q: Dry stone masonry wall
A: Dry stone masonry wall means a wall built without mortar. It relies on interlocking stones and gravity for stability, allowing natural drainage and flexibility with ground movement.
Q: Dry stone walling for Beginners
A: Dry stone walling for beginners involves learning to select and place stones carefully. Basic workshops or local classes provide hands-on instruction to build stable, no-mortar walls.
Q: Dry stone masonry certification
A: Dry stone masonry certification shows that you have received formal training in traditional wall building techniques. Certification courses assess your skill in stone selection, placement, and overall construction.
Q: Dry stone masonry course
A: Dry stone masonry course offers structured training to master building no-mortar walls. These courses cover technique fundamentals and advanced skills needed for creating durable, interlocking stone structures.
Q: Dry stone retaining wall
A: Dry stone retaining wall uses carefully placed stones to hold back soil on slopes. The interlocking method helps manage erosion and water drainage without using mortar.
Q: Dry stone wall cost
A: Dry stone wall cost depends on factors like stone quality, wall size, and labor. Prices cover material expense and the skill required, varying by region and project complexity.
Q: Dry stone wall with mortar
A: Dry stone wall with mortar blends traditional stone placement methods with mortar for extra stability. While not typical for classic dry stone techniques, it offers a hybrid approach in some projects.
Q: What are the common problems with dry stone walls?
A: Common problems with dry stone walls include shifting stones, water seepage, and settling issues. Careful construction and routine maintenance help prevent these challenges from affecting wall stability.
Q: Do dry stone walls require foundations?
A: Dry stone walls usually don’t require deep foundations. A prepared base of compacted rubble or stone suffices to support the wall’s weight and maintain its stability.
Q: Is dry stone walling a skilled trade?
A: Dry stone walling is a skilled trade that depends on precise stone placement and an understanding of natural mechanics. Mastery comes from experience and focused training.
Q: Can you DIY dry stone walling?
A: DIY dry stone walling is achievable if you start with proper research and beginner courses. With careful planning, the right tools, and safety measures, you can build a functional, mortar-free wall.